Plants are my father’s life. He planted green things in front of and inside my house. Is it your life as well? Then you’ll absolutely love the DIY plant stand inspirations you’re about to see.
This page is home of magnificent plant stand ideas you can make by your own. Green plants are so refreshing. Some colorful flowers are making the rooms and garden more attractive.
But gorgeous plant stand you build by your own hand is increasing your plants’ beauty. Just take a look a little bit and you’ll know how you’re going to add more charm to your hobby.
Living in a limited space but want something good for your plants? Don’t worry; all inspirations down here are perfect for all types of house. Go find ones that fit your house the most.
Modern Styled DIY Plant Stand from Woods
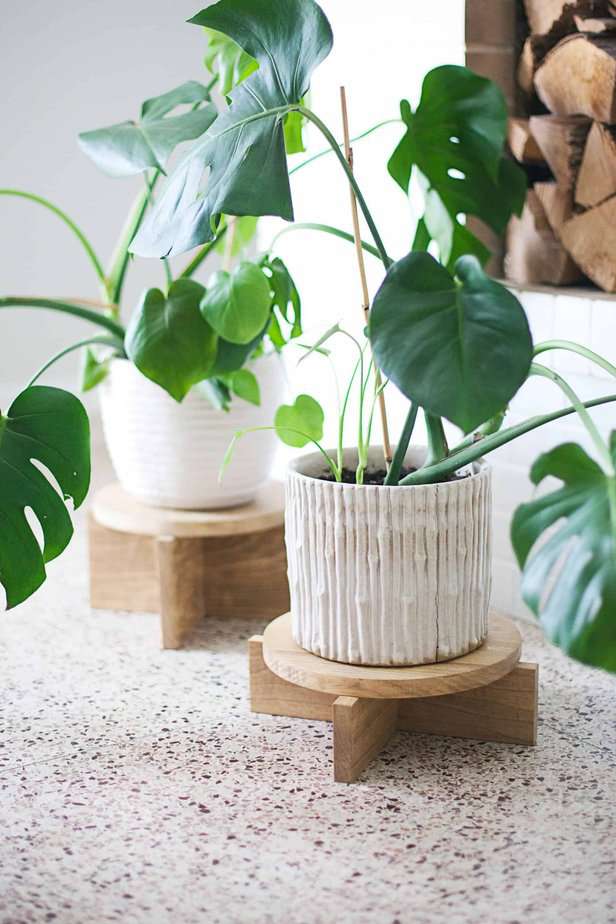
Many of us believe that woods are not for modern house. I don’t really think so. I’ve seen woods used in modern house and they improve the incredible interior.
If you want your wooden plant stand helps beautifying your modern house, you’ll have to follow these steps. First of all, prepare the tools that help you making modern plant stands from woods.
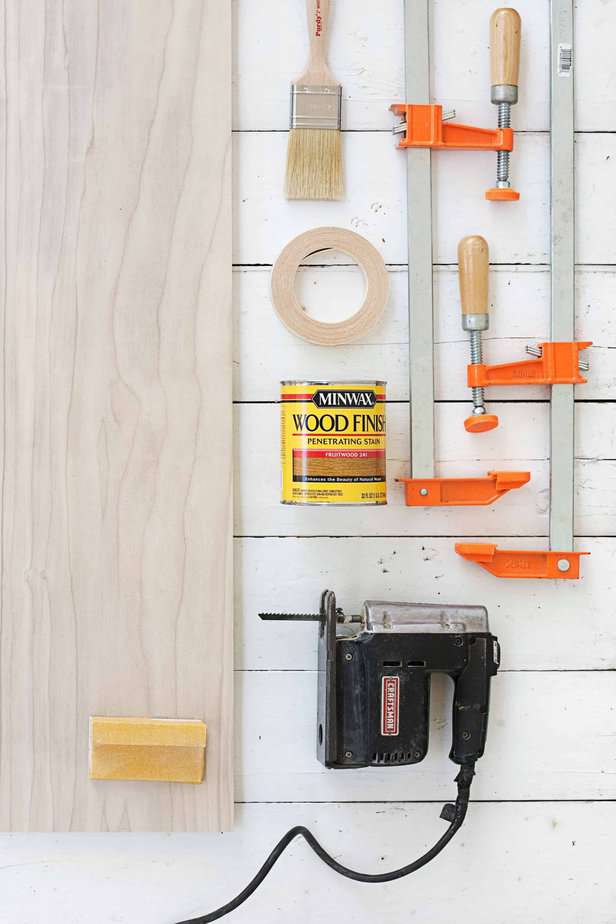
- Jig saw
- Clamps that can extend to 12 inches or more
- Hammer
- Orbital sander
- Staining rag or brush
When you’re done preparing the tools, it is time to hunt for the materials. Make sure the entire materials below are all prepared on your working desk before you start building the plant stand.
- Lumber that is 3.5 feet long or longer
- Sandpaper in three different grits, 80, 120, and 180
- Finishing nails or wire brads that is 0.75 inch long
- Wood glue
- Veneer edge banding
If you want stained woods, consider using maple wood or oak wood. Pine wood is not so recommended since this wood can dent easily and cannot stain well. Poplar wood is highly recommended since it doesn’t stain very well but it has yellowish streaks. However, poplar woods take paint very nicely. Plywood is another good option for this project
Tutorial Making Your Very Own Plant Stands
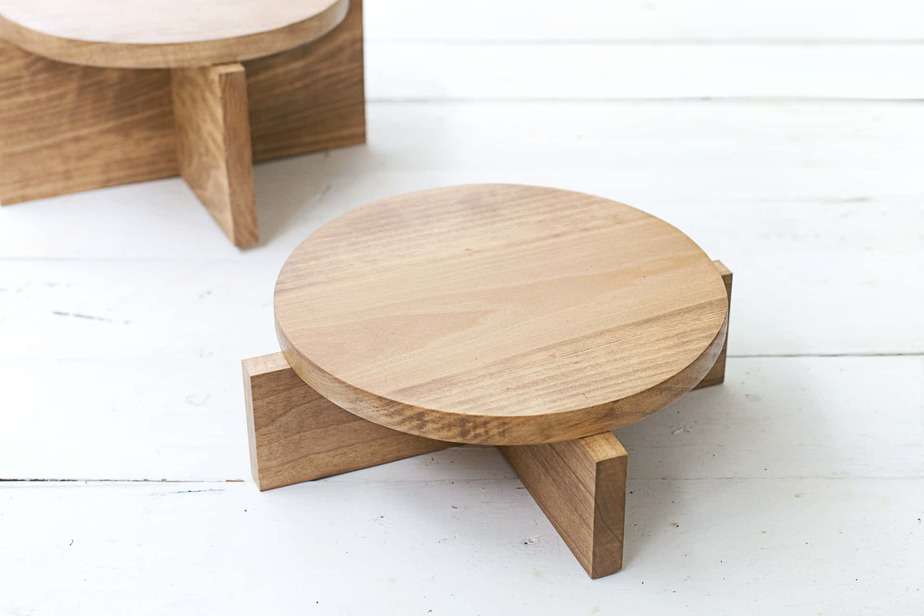
1. DIY Plant Stand: Making the Base
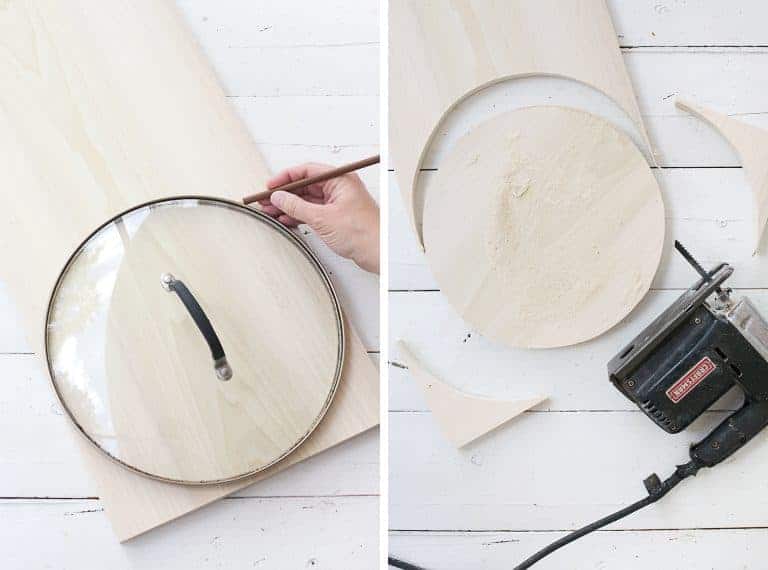
At your lumber’s end, draw a circle with 10 inches diameter. Use compass or another circular object like your pan’s lid to make the circle. Then cut out your circle using jigsaw.
Make more circles if you’re going to build more plant stands. Take your lumber and hold it firmly on your table. Then use your jigsaw to cut overhanging edge.
To ease you doing this, cut your lumber using jigsaw on surface with lower height such as a bench. Press down the lumber with your knee to keep your lumber steady while you’re moving your jigsaw blade slowly.
2. Preparing X Bases for Your DIY Plant Stand
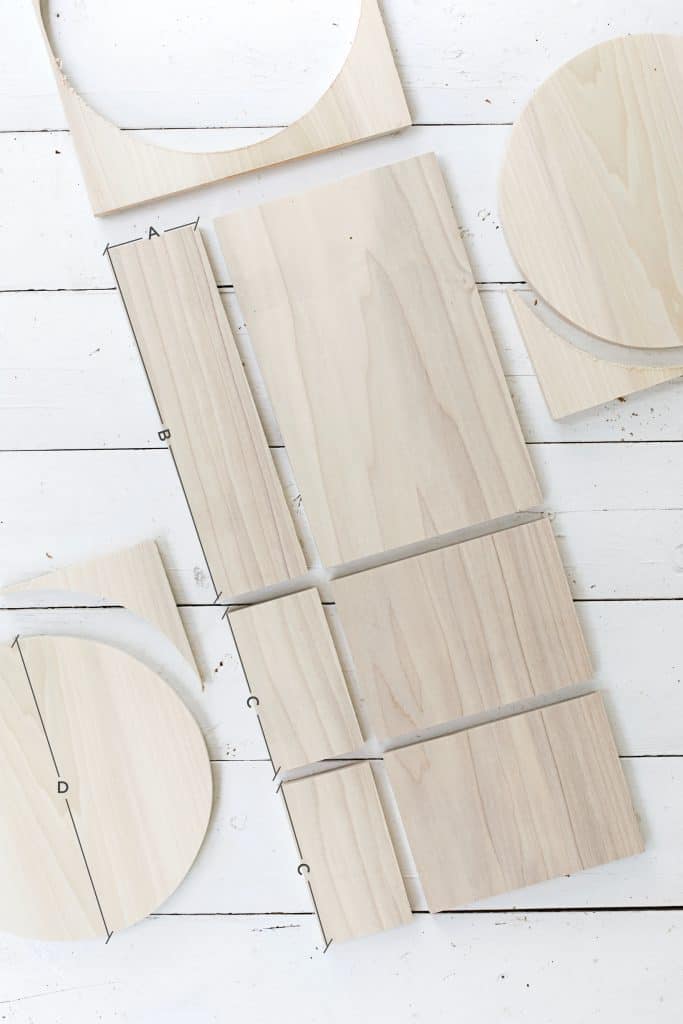
Six feet length board is going to give you two stands for your plant. Make two circles then use rest of your lumber length to make X base for your stands. D means your circles’ diameter. Ten is the suggested length.
A will be the X base’s height. Six should be the maximum height of your X bases. B must be your circle’s diameter plus two inches. If your circle is 10 inches, this B must be 12 inches.
Finally, C must be half of the B minus board thickness’s half. So if your B is 12 inches and board thickness is 2 inches, the C should be 5 inches. Have you prepared the entire X bases?
3. Sanding the Entire Wood Pieces for Flawless DIY Plant Stand
Sand the entire wood pieces’ surfaces thoroughly. Start sanding using 80grit sandpaper. This is going to help you shaping your wood edges, especially the circles’ edges.
Continue with 120grit sandpaper to remove the scratch marks that are left by previous sandpaper. The last sandpaper in 180 grits will make your woods smooth and nice.
4. Assembling Your DIY Plant Stand‘s Elements
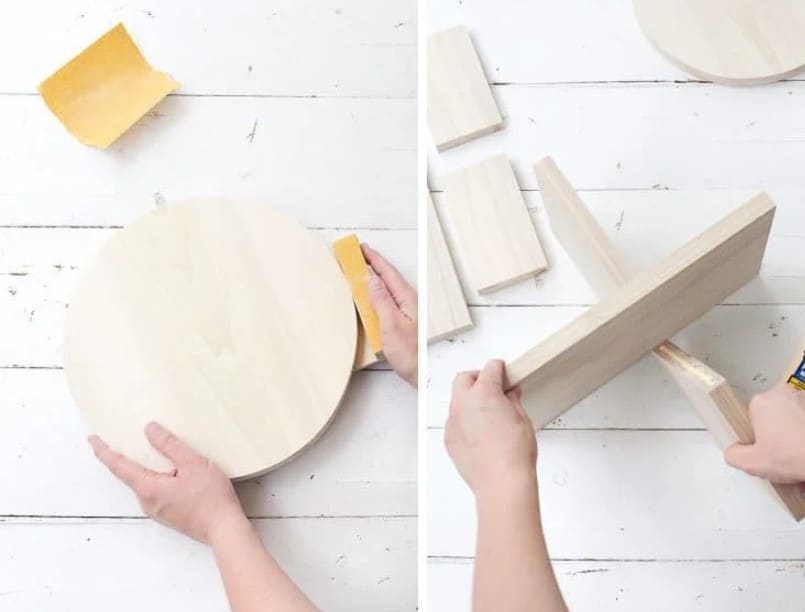
To assemble plant stand X base, wood glue would help. To build the X base, you’re going to need one B wood mentioned on second step and two C woods.
Apply your wood glue only on the unstained wood. Stained wood is not able to absorb the glue. Your glue strength will be decreased when you apply it on the stained wood. For stained glue, use the gorilla glue that works better.
5. Clamping Together the DIY Plant Stand X Base
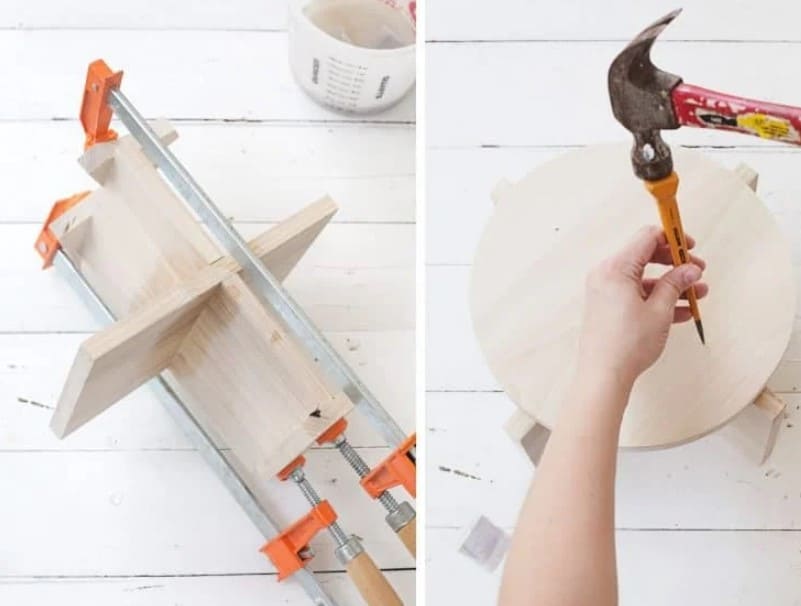
You need to make sure that your X base is all clamped tightly. Then you must wipe away the entire excess wood glue immediately.
Wood glue is going to repel stain then become yellow, you don’t want this in your plant stands since you can’t sand away the stains easily.
6. Strengthening Your DIY Plant Stand
When your wood glue is dry already, you need to glue your circular piece above your X base then affix it. Clamp your plant stand top to its place.
Finishing nails can be used to add more strength to your finished plant stand. But if you clamp the entire pieces that are unfinished woods using the wood glue, you don’t have to use the nails to stabilize your plant stand.
However, if you need to use those nails, make sure you use the nail setter that will tap your finishing nails under your wood surface. Then cover any hole using the wood filler that’s stainable.
7. Final Step for Excellent Wooden DIY Plant Stand
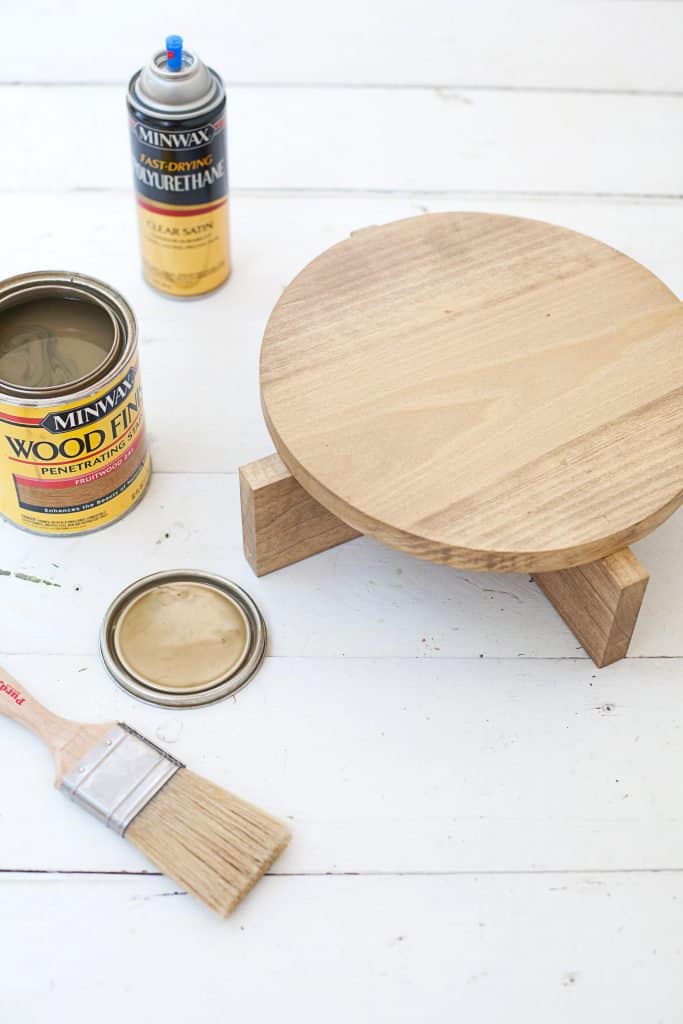
Use your creativity to finish your modern styled wooden plant stand. If you want to stain your plant stands, go finish your stands using polyurethane that will protect woods from water splashing.
Finish your stands properly by spraying two coats of light poly to your stands. Then sand them with steel wool. Finish them again using another poly coat.
Last steps above are going to smooth down the wood hairs roughness that is sticking up when poly coats are moistening your stands’ woods.
For you who want to paint the woods, a primer coat will help. Always sand your woods lightly using the 400 grit sandpaper that’s wet after applying primer coat. This is going to make your stands smoother.
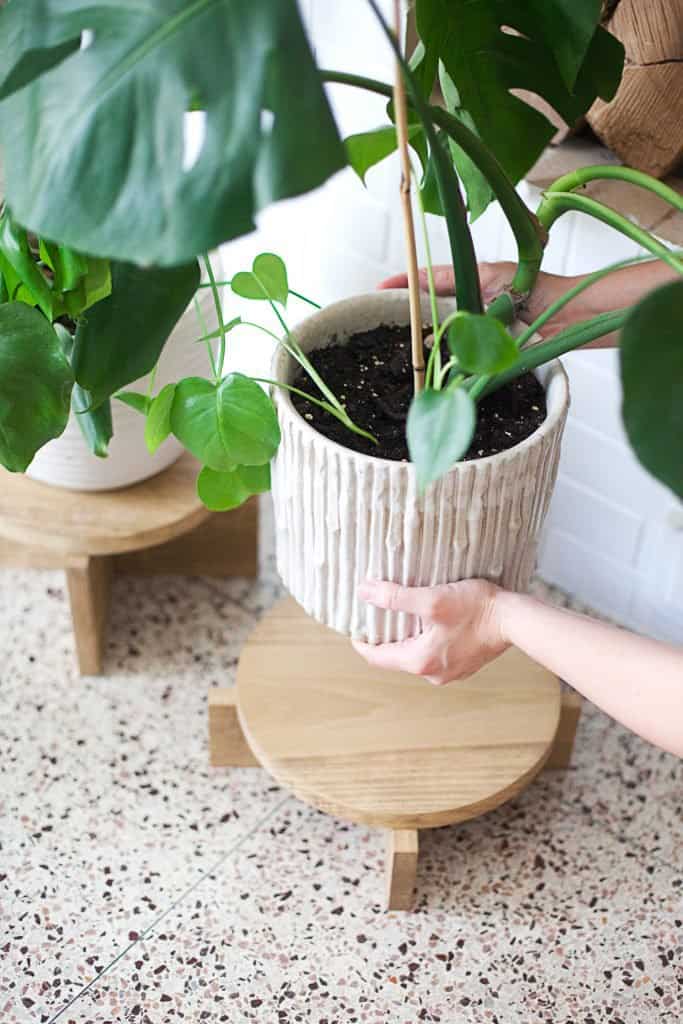
Finish the steps by applying lots of light coats to your plant stands. Now place the stands wherever you desire. Place the pots of your favorite plants on those stands. They’re going to beautify your beautiful rooms or exterior.
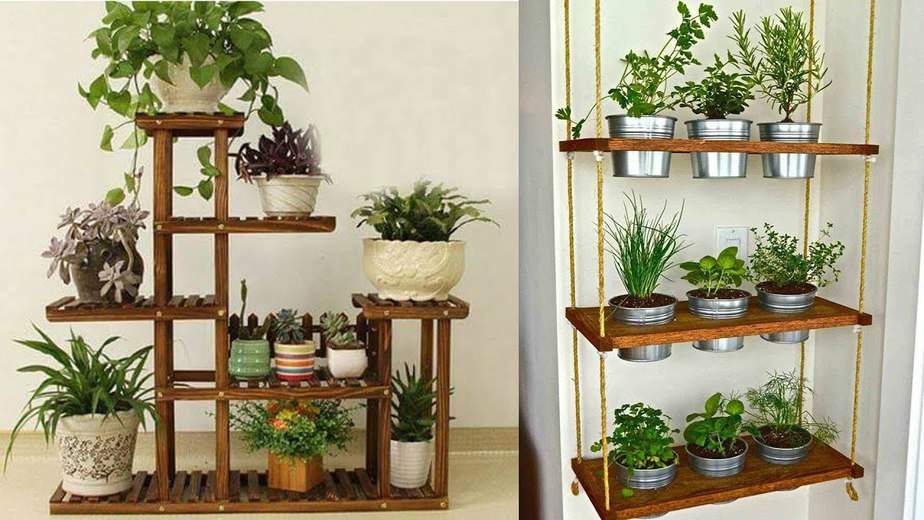
Floating DIY Plant Stand for Beautiful Windows
Living in a limited space might make you feel bad. But keep in your mind that you can make your limited space looks more beautiful than others’ place.
One way to do it is by making floating plant display. Sure you can buy something like this in the store, but to save your budget, why don’t you make it yourself? Don’t worry; we’ll help you with that.
To build the extraordinary floating plant display, there are materials to prepare:
- Round shaped wooden plate you can get from the store or secondhand wooden element like door or table
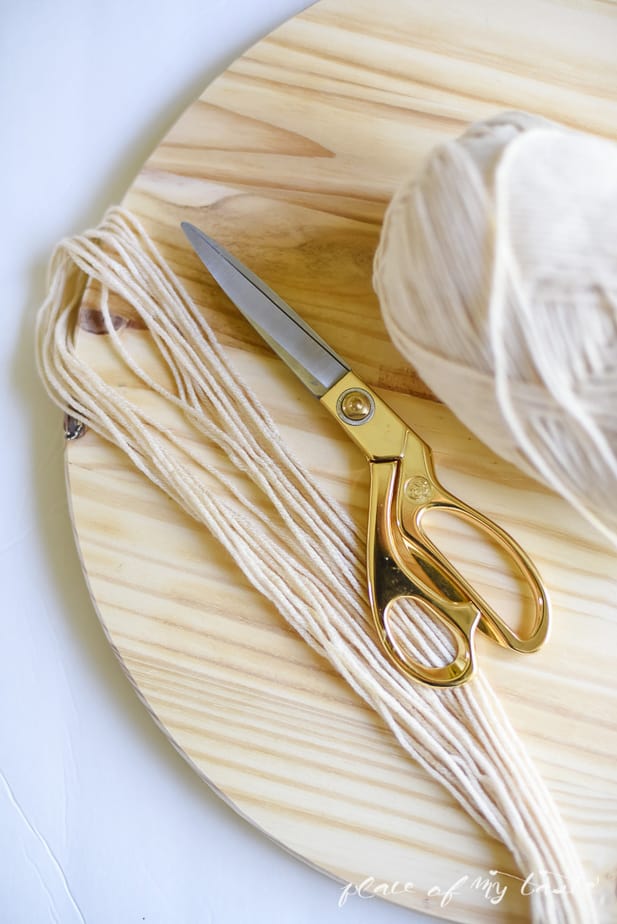
- Yarn
- Scissor
Now, get yourself ready to start building the floating plant display
Easy Steps to Build Floating DIY Plant Stand
- If wooden plate you use is round already since you bought it from the store, jump to step number two. But if your wooden plate is from your old furniture, draw circle shape on the surface.
Then cut your wood into round. Hanging round plate is much easier compared to the other shapes.
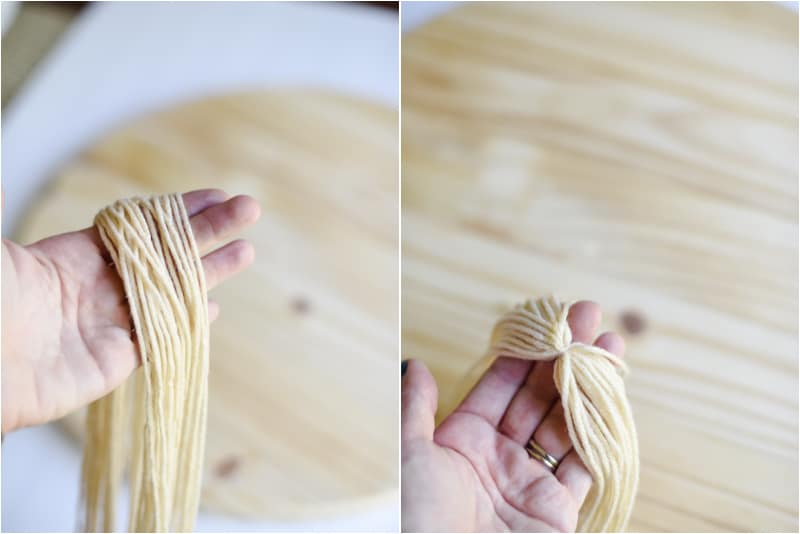
- Cut your yarn into 24 pieces that each piece is 3½ yard long then fold your yarn in half so you can grab its center. Make a knot in that center using another yarn piece.
You’re going to use that center point as the place to hang your floating plant display.
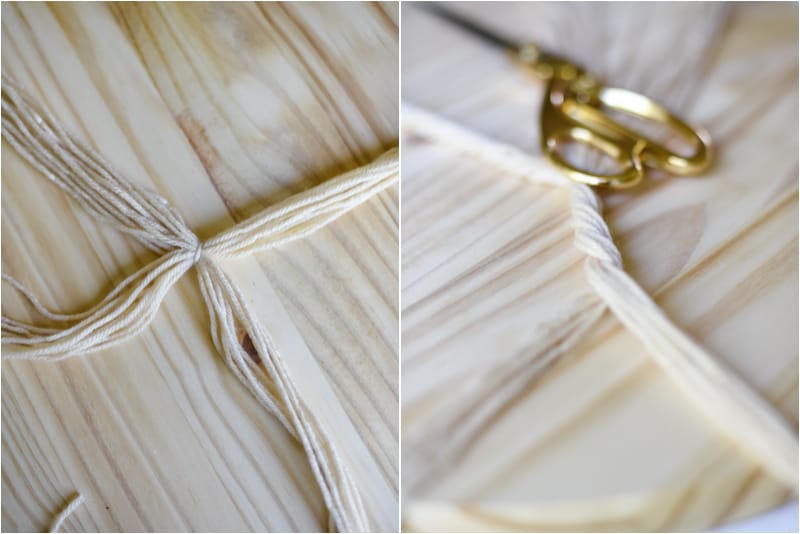
- Now you get a tied yarn. Divide that yarn into four sections from your yarn’s center tie. Every section should have 12 strings.
Then again, divide every part so that you will get 6 strings section. Twist every 6 strings together. Or you might want to separate the 12 strings into 4 different parts. Braid every part for more beautiful floating plant display.
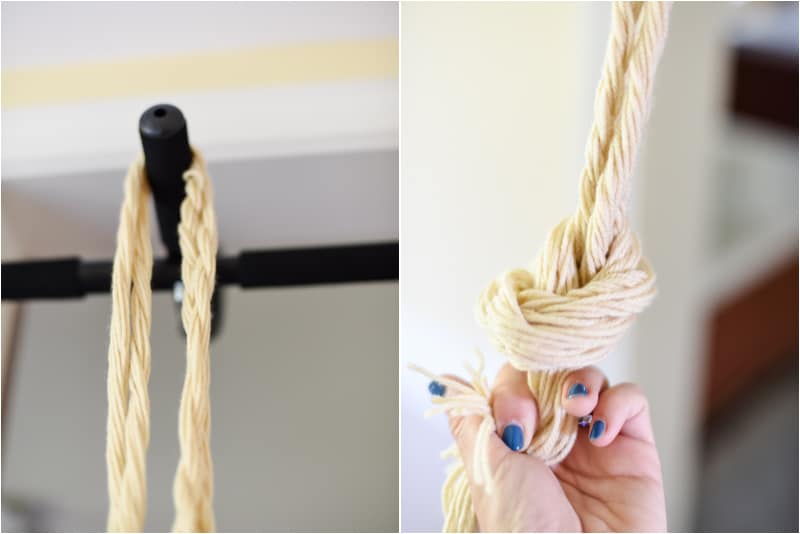
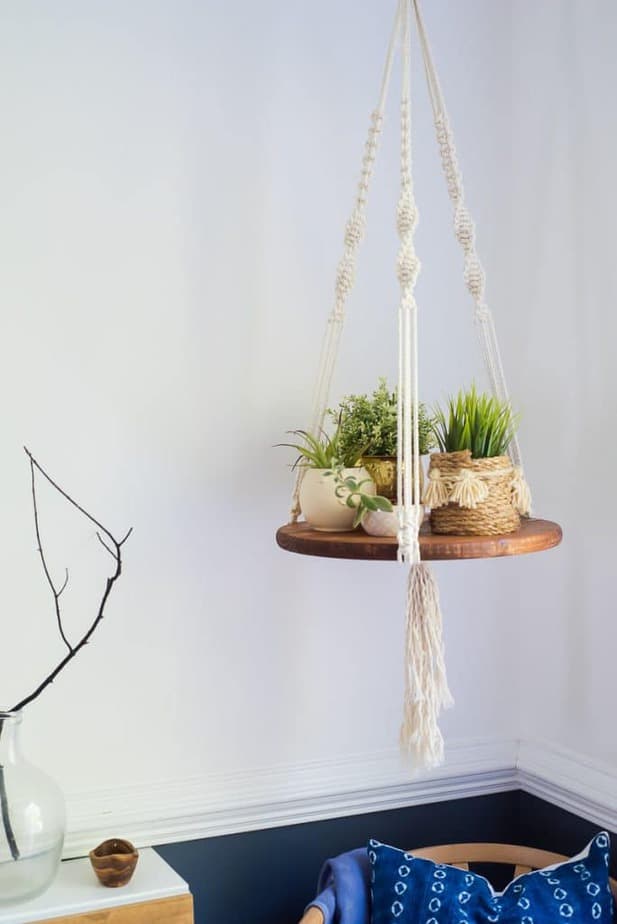
- Hang the floating plant display high enough so that you will get easy access to work with the entire strings. Tie one knot about 4 inches under the very first center knot.
Now tie one final knot but leave some tassel that will dangle under the knot. Here is where you are about to place the plant stand.
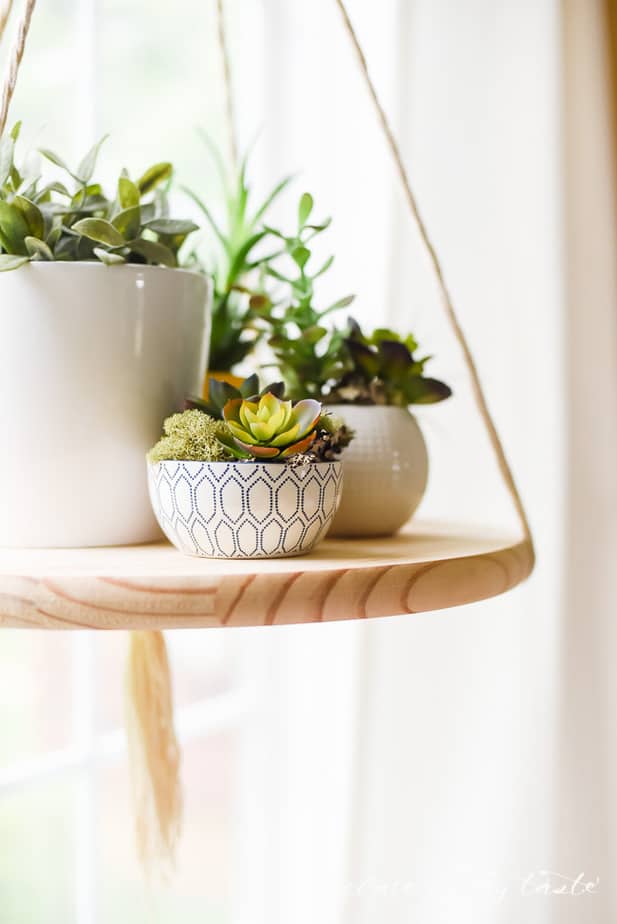
- Slip the round wooden plate through your ropes. Make sure you settle your bottom knot under your round shaped wooden plate.
It is helpful to arrange 4 braided or twisted ropes evenly. It is going to balance your round wooden floating plant display. Place one or some potted plants on your floating plant shelf.
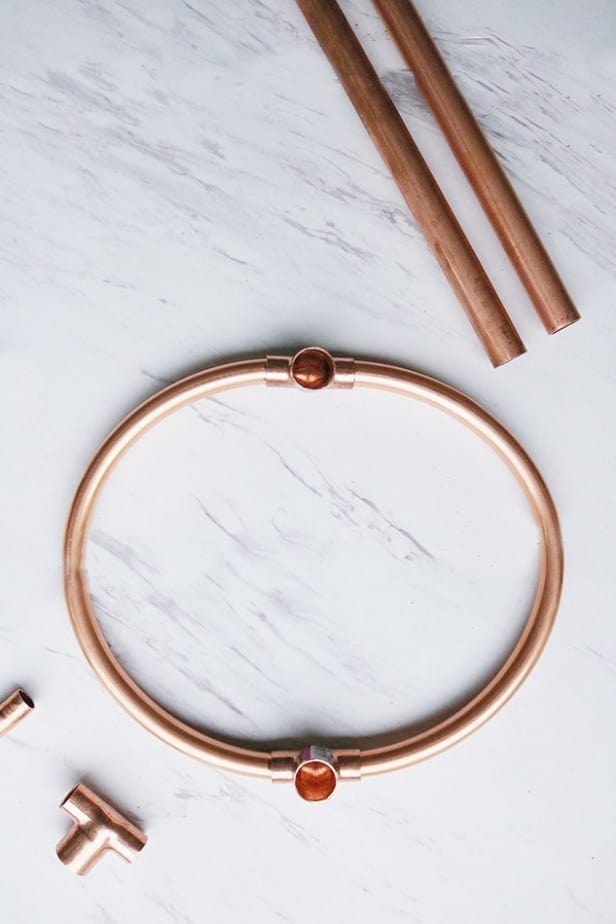
Industrial Styled Room with Unique Copper DIY Plant Stand
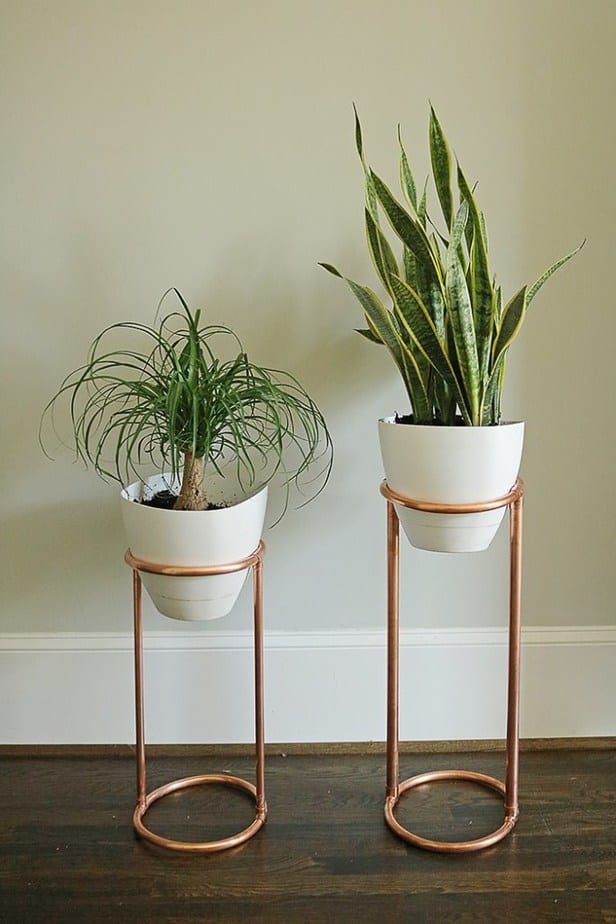
Looking for something unique for your industrial styled interior? There’s nothing better than copper plant stand you build by yourself.
This plant stand is going to add midcentury fees to your room, wherever it is placed. Prepare these materials first:
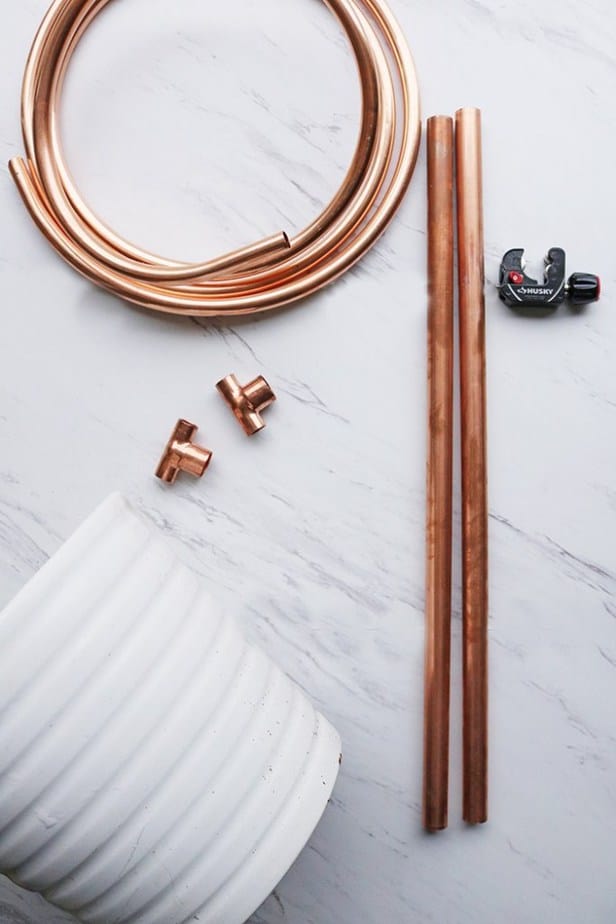
- Copper pipes
- Copper coil
- Copper cutter
- Four pieces of copper T part
- E6000 glue
- Black sharpie
- Tape measure
- Potted plants
Have you collected all of those materials? If you haven’t gathered them all, you couldn’t start building the plant stand. Now let me show you how to build this unique plant stand.
Midcentury Styled DIY Plant Stand Made Of Copper
To make this copper plant stand, you’ll only have to spend thirty minutes. However, for best plant stand, you’re highly recommended to leave your plant stands a whole night.
This is going to help your stands’ glue to set. Then on the next day your copper plant stand are going to be ready to hold your potted plants. Alright, no more chitchat; here are complete steps you better take for great stands.
- You’re free to decide the diameter for both copper coil and pipes. If you finally opt for ¾ inch sized copper pipes, you’re going to need ½ inch sized copper T and copper coil in ½ inch diameter.
If you have to cut your copper pipes, you have to do it truly carefully since copper could be really expensive.
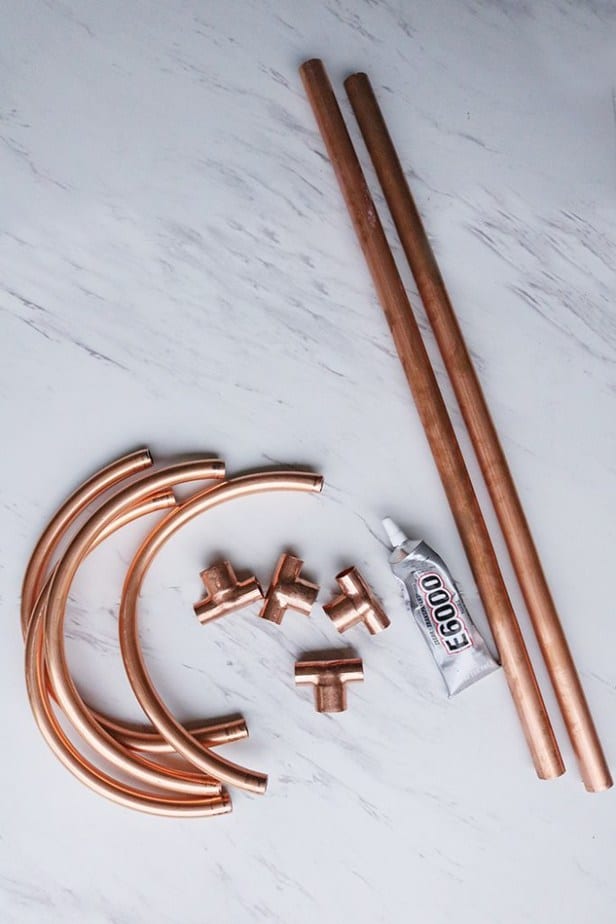
- Once you’re done cutting your copper pipes for your plant stands’ sides, you must continue cutting your copper coil.
Now, measure your pot’s diameters. For plastic pots, cutting copper coils in oval would be great. But if your pots are round ceramic pots, you must get wider and longer copper coils.
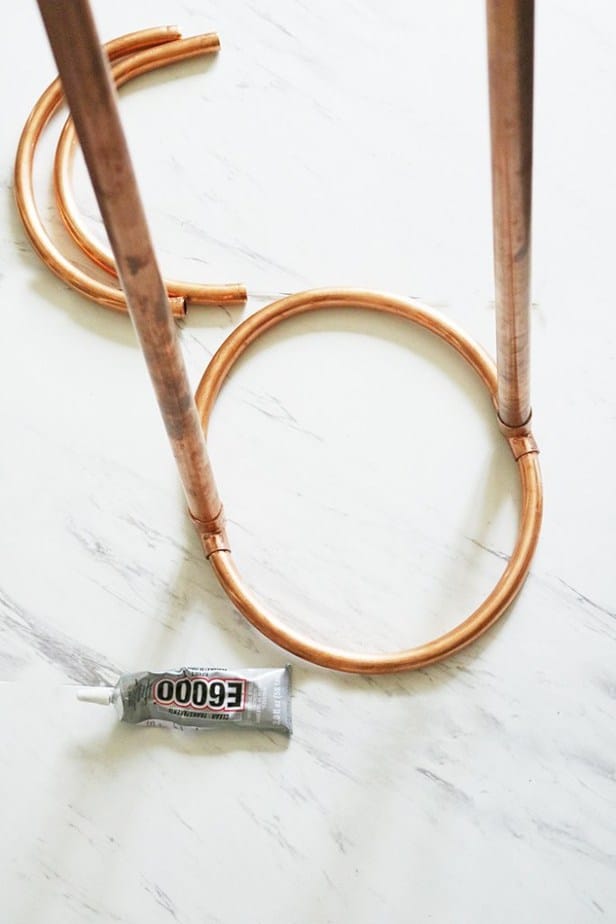
- After cutting your copper coils, assemble the coils and add some copper T. Use your E6000 to glue all ends together.
You might have to manipulate your copper coil in order to shape the forms together. After gluing, you must leave your copper plant stands for one night; this is giving your glue to dry.
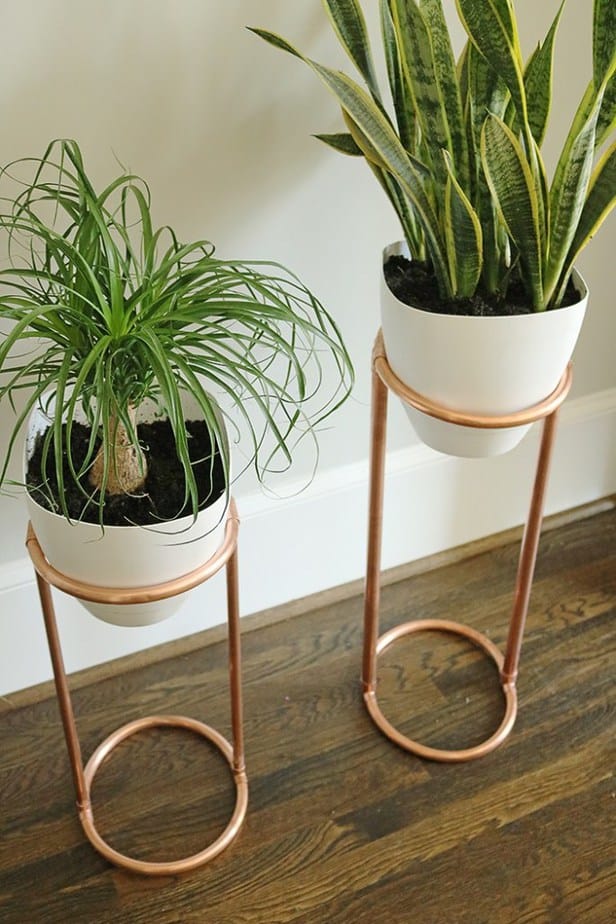
- While waiting for the glue to dry, clean the plant stand from copper using copper cleaner and remover for nail polish.
This is going to give your copper plant stands some red ink accents. On the other day, place your copper plant stands on the place you want. Then put your potted plants on those stands.
Concrete DIY Plant Stand for Natural Interior Design
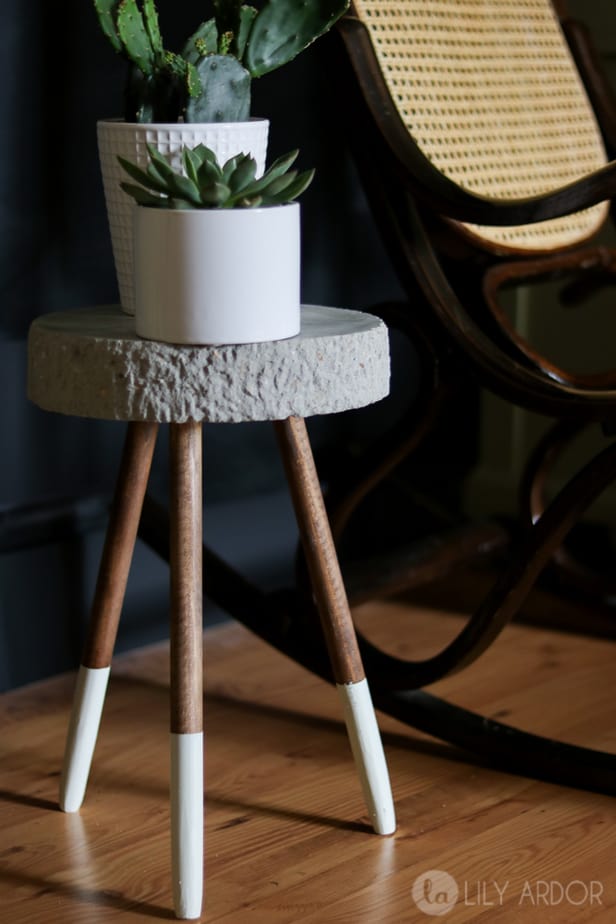
If you want something natural, woods and stones are the best solution. You can combine both materials to create unique plant stands for natural interior.
As always, everything you need must be prepared first. Below are things you have to collect before you start building.
- Concrete
- Long stick or dowel
- Bucket for top of your plant stand
- Bucket you’ll use to mix
- Handsaw or Miter saw
- Sander
- Wood stain in the color you love
- Tape
- Paper
- Spray paint
- Screw driver with flat head
- Hammer
Is everything ready? Then what are you waiting for? Follow these steps to make your best natural styled plant stands.
All Steps That Lead to Most Natural DIY Plant Stand
1. Prepare the legs of your concrete plant stands
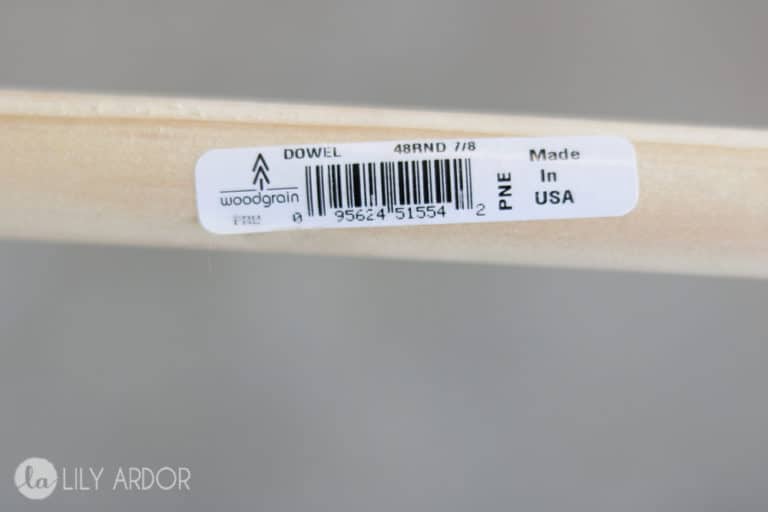
If you also use this 7/8 feet dowel or another long stick with the same length, you need to cut it into three different parts. They’re going to be your plant stand’s legs.
Or you can look for three 16 inches sticks for your plant stand’s legs. Yes, you’ll only have three legs.
2. Creating concrete mixture
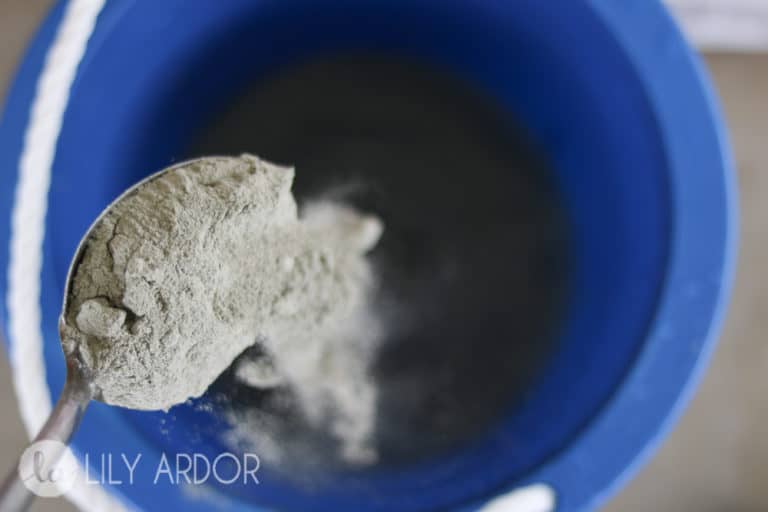
Just place your concrete powder to your bucket then add some water. Keep in your mind that the size of wet concrete is double of your concrete powder.
So you better start with small concrete powder. Start filling ¼ bucket with cold water. Then add some concrete powder. Mix your concrete well to avoid any clumps.
3. Preparing your plant stand’s top

Now mark another bucket in 2.5 inches from bucket’s bottom. You don’t want your plant stand’s top to be thicker than this.
The pour your concrete mixture into that bucket, be careful so that you won’t pass the mark. Take the three wooden legs and stick those legs into your concrete mixture. Add 3 inches gaps between the legs to form triangle shape.
Place your plant stand mixture outside and wait for one night. After 24 hours, pull your plant stand top out of your bucket. Now use hammer and screwdriver with flat head to chip your concrete plant stand’s edges.
4. Stain your concrete plant stand’s legs
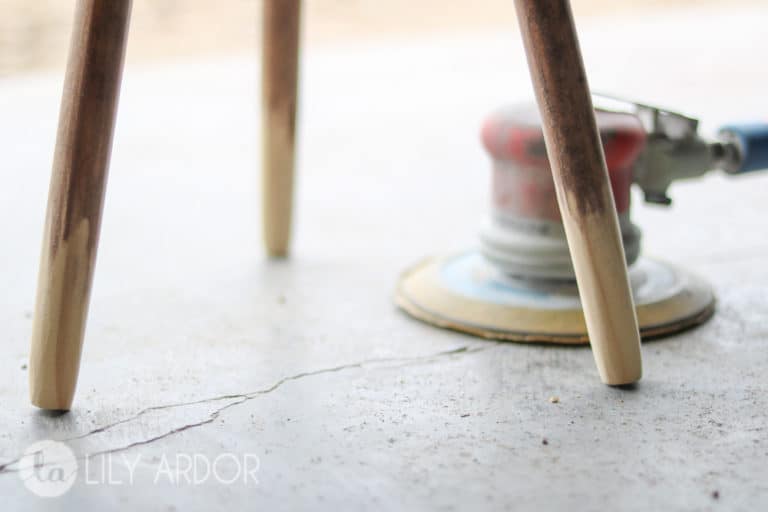
Take the wood stain that you love then use napkin to rub it to your wooden legs. You can leave your stain to settle in for a whole night. Or you can just leave it for four to six hours before you paint over the stain.
5. Make your plant stand’s legs look more adorable
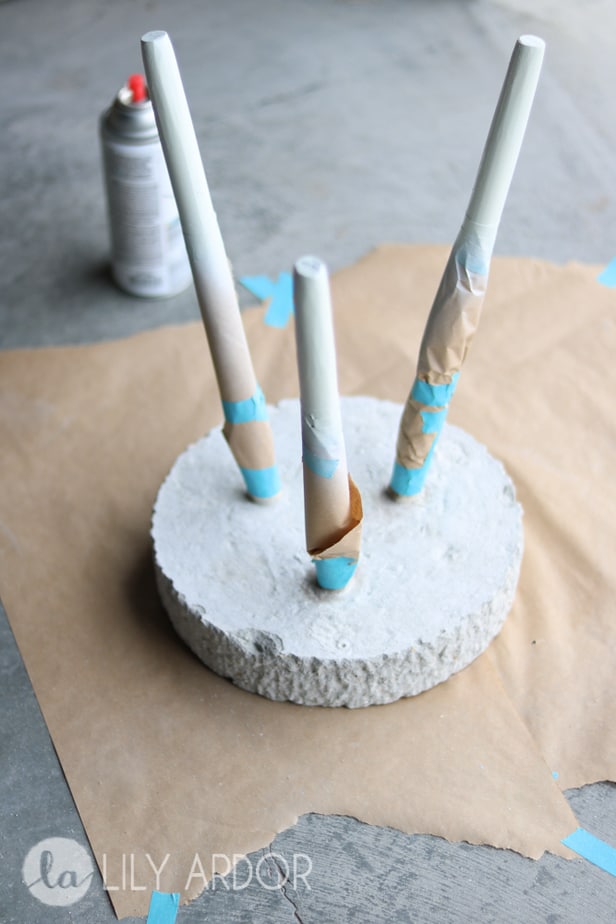
Tape the legs about 5 inches from legs’ bottom. Then paint the bottom part of your wooden legs with something different like white. Use not only the paint but also the primer.
If you think you’ll use several coats of stain, you better use paint or primer since stain would leak into primer or paint.
And that’s it. You can even use this as a table, but we’re talking about concrete plant stand, so use it to place your plants. Put one or two potted plants on this and it will be ready to beautify your living room corner.
Want some other ideas about do it yourself plant stands? Check some other inspirations down here.
Simple DIY Plant Stand From Boxes

I love this one so much. It has simple design, yet adorable look. This plant stand is going to fit any interior design. It will fit in your modern living room, shabby chic kitchen, and other rooms.
Unfortunately, this belongs to small plants. If you’re looking for plant stands that can hold big potted plants, this one isn’t for you. Interested to build this cute little plant stand?
Materials needed to build this plant stand:
- One long wooden sticks or four short wooden sticks
- Four to five wooden boxes
- Wooden glue or nails
- Hammer if you prefer nails instead of wooden glue
Let us start building the simplest wooden plant stand.
- Make the design of how you want your plant stand look like. This one gets unique shape with two horizontal boxes and three vertical boxes. Then connect all those wooden boxes together by nailing them or gluing them using wood glue. If you’re about to glue your boxes, you must leave them for one night to let your glue dries.
- Once everything is connected, mount them on their legs. Cut your long wooden stick into four shorter sticks. If you already got short sticks, you just have to connect them to your wooden boxes. Make sure your wooden legs are able to hold everything you put on your plant stand.
- Place your plant stand somewhere in the room. Then prepare some small sized potted plants. Put those cute plants on and inside your wooden boxes. If you have some bigger plants, put them on both sides of the gorgeous wooden plant stand. They’re going to make your interior feels fresher with lots of green living plants.
Oh, one more thing, make your wooden plant stand looks more adorable by painting the wooden boxes. If your room has white painted walls, your wooden boxes should have another color so that they won’t be invisible.
Or you can adjust the color of your wooden boxes with the paint color of your bigger pots. If those pots are in pink, paint the wooden boxes in pink to match them.
Using Old Furniture to Build DIY Plant Stand
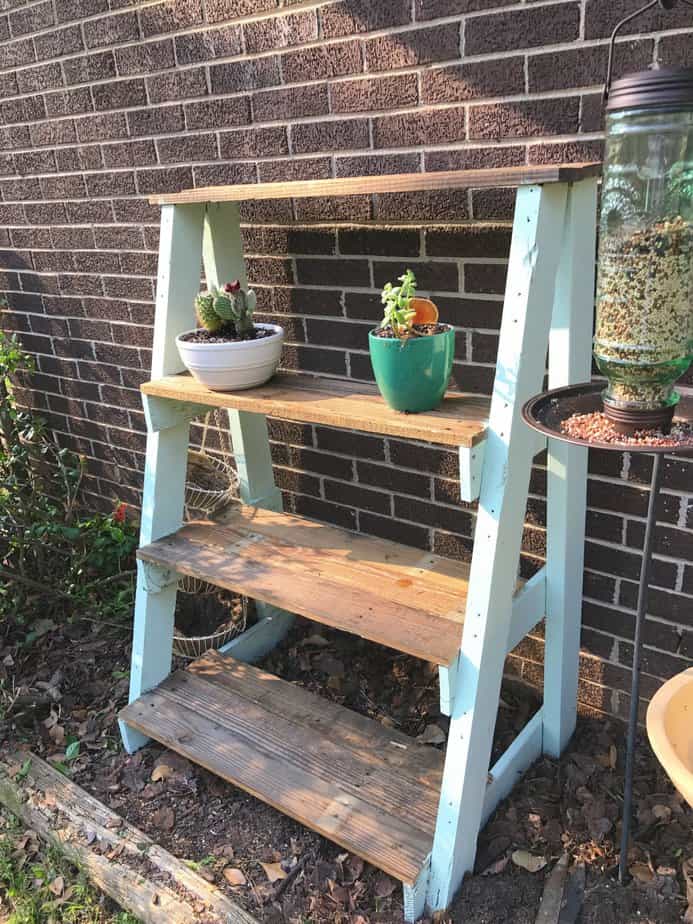
Do you have an old bookshelf or old table? Don’t throw it away. They’re magnificent material for your do it yourself project. My dad built a dog house from a wooden dining table and my dog loved it so much.
You’ll also love the plant stand you made through the do it yourself project. Always make your own design first on the paper. Then you’ll see what you need to build that incredible plant stand.
Even an old cupboard can be an inspiring plant stand. Remove the door of your cupboard and they’re going to be a new house for various sized potted plants.
Don’t forget to recolor your cupboard before you place the plants inside them. Or you can use foldable ladder or wooden ladder to build simple but cute plant stand. If your ladder is foldable, just place your pots the ladder’s steps.
But if you’re using a wooden ladder, mount some small pots on its step. Then fill them with cute little plants. They cannot hold heavy stuffs so don’t mount your big pots on the ladder.
Wooden ladder is the right option to add some beauty to your interior. It can be absolutely impressive inside shabby chic room, rustic room, or natural themed living room.