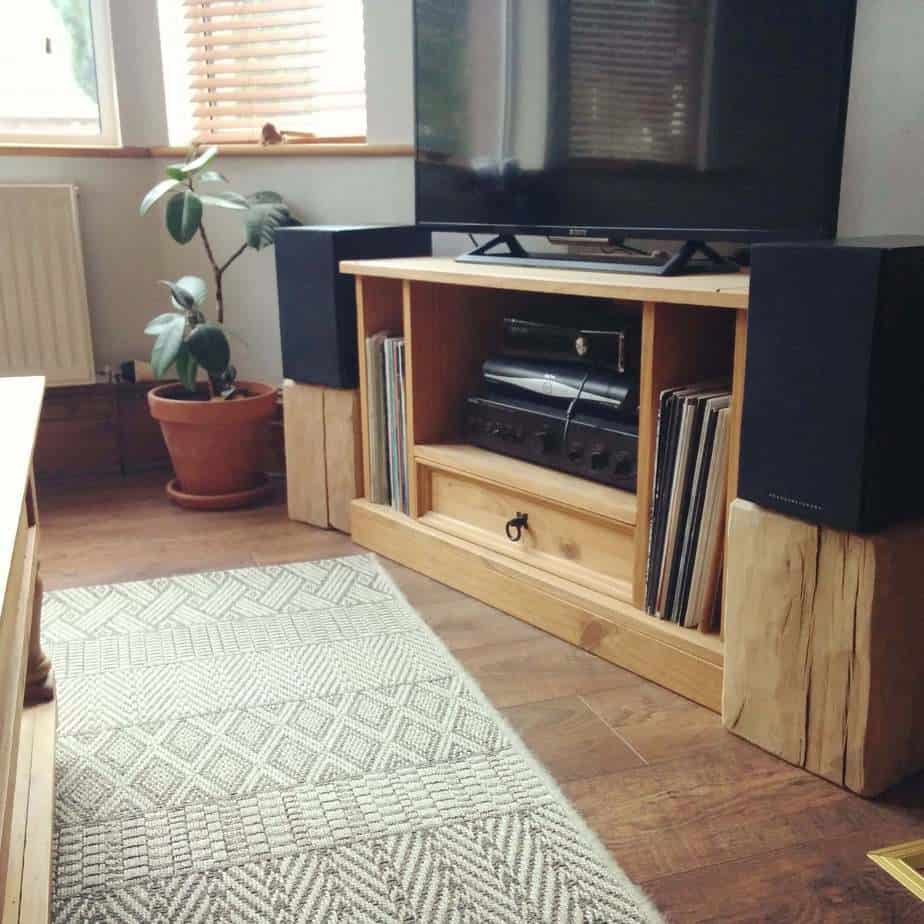
Speaker stand and desktop platform for speaker is going to make big sound difference in the room. There are plenty ways to support your loudspeakers.
However, some of us are still confused about choosing the right stand for their speakers. You might want to know which speaker stand is great for your studio. Or you might consider building DIY speaker stand.
Before you build your own speaker stand, there are basic things you better learn first. What are those things? Let me show you some of them.
The Function of DIY Speaker Stand

So many speaker stands come with fitted spikes on their base. Those spikes are going to make stable and rigid contact with your studio’s floor.
If you speaker stand is stable and robust, you can place your wonderful speaker stand on your solid flooring.
Unfortunately, there will be problems caused on your wooden floors, because of the vibrations that come from speaker cabinet.
Your speaker cabinet’s vibrations will be transferred to your wooden floor through the spikes and rigid stand. Then your wooden floor is going to act as soundboards king.
Keep in your mind that the heavier your stand is, the less your speaker is going to move.
With so many speaker stands in pro-audio and hi-fi types, you can fill the support column’s holes with heave material in order to damp the resonances and add mass.
You can use shot, sand, or the other heavy material that’s well damped to make stronger speaker stand. It is also good use dry sand to build a firmer speaker stand.
It can even be placed in plastic bags so that things won’t get messy. So, ready to build your own speaker stand? Get ready for these complete steps you must follow for a great speaker stand in your studio.
Building Your Own DIY Speaker Stand
Okay, so you have a couple of beautiful speakers waiting for their stand. What you have to do first is measuring your speakers so that you could build great stands that fit them.
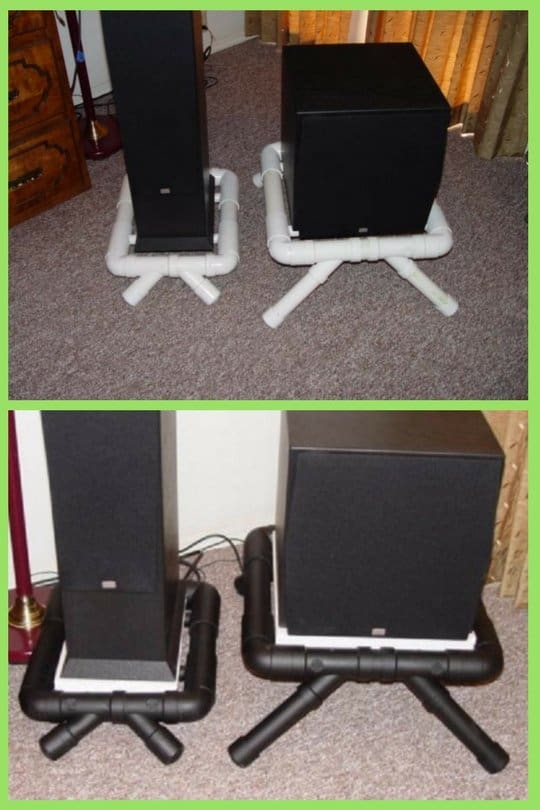
Then you could try inspiring idea about designing sand filled PVC speaker stands. Your speaker stand should be strong enough to carry your speakers, studio monitors, or bookshelves.
1: Prepare the Materials You Need to Make DIY Speaker Stand
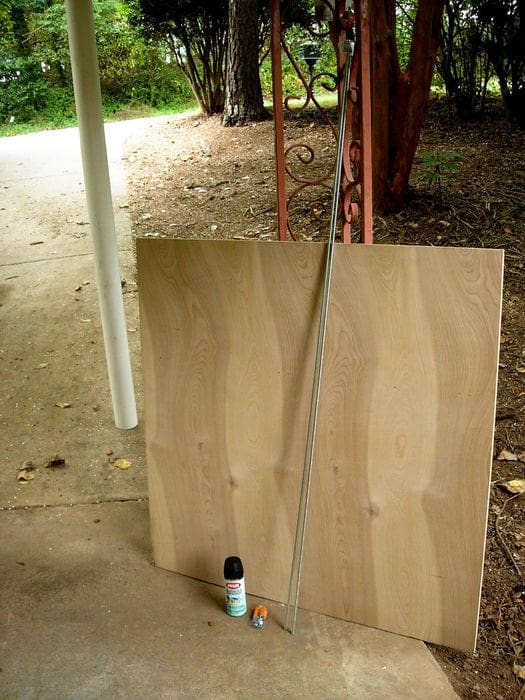
Go to the closest hardware store to get some crucial materials to build speaker stand including 4 inches PVC in 10 feet length, 3/8 inch all thread in 10feet length, ¾ inch plywood in 4 feet x 4 feet sized piece, 6 pieces of 3/8 washers and nuts, caulk, sand, spray paint, and wood stain.
The wood stain is optional so you don’t have to get it if you don’t like.
2: Get the Tools Ready before You Start Building DIY Speaker Stand
You’re going to need drill, caulk gun if you don’t use the squeezable caulk, paddle drill bits in 3/8 inch and 1 inch, hack saw that helps you cut the all thread and PVC, circular saw that is great to cut your plywood.
Once you’re done gathering those tools and materials, you can start creating your own speaker stand.
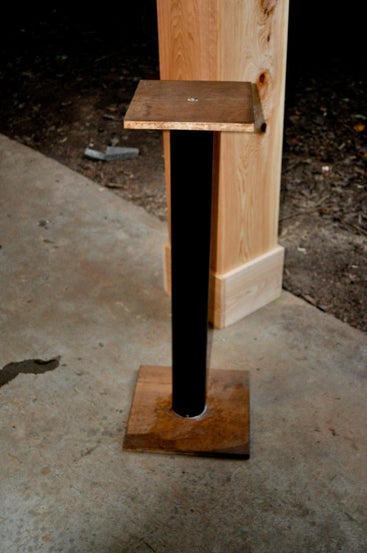
3: Cut Your Speaker Platforms and Bases for Great DIY Speaker Stand
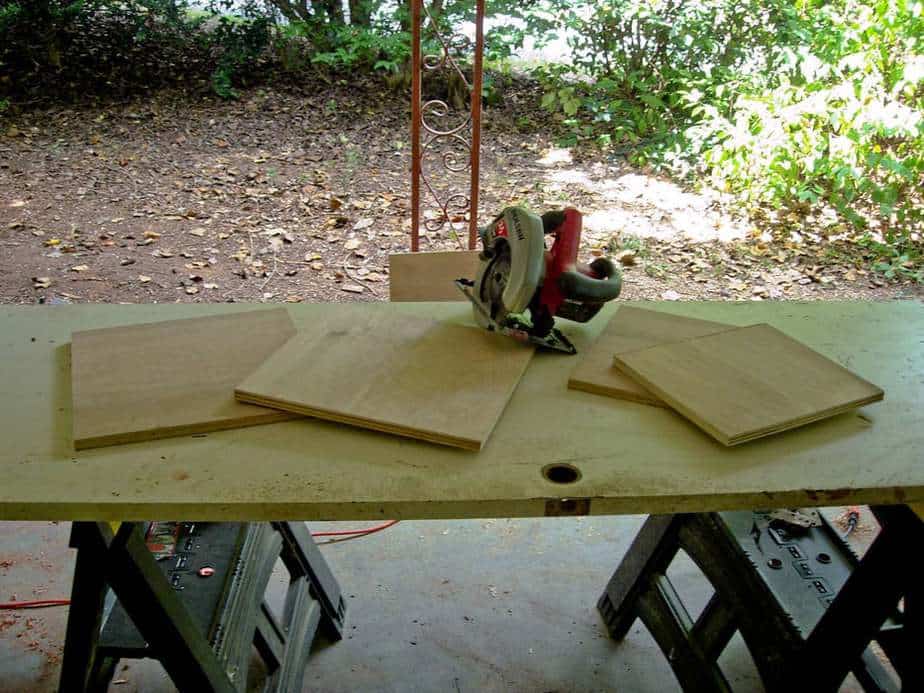
To decide your tops’ and bases’ size of speaker stand, you must know the height of your speaker stand and the speakers’ size.
For example, if you want your stands’ height is 4 feet, you need to cut your base in 16 inches wide. This size is going to create sturdy and nice base.
Besides, you need 12 inches x 14 inches speaker platform that will give room to your speakers. Use your circular saw to start cutting your wood to sizes you have decided.
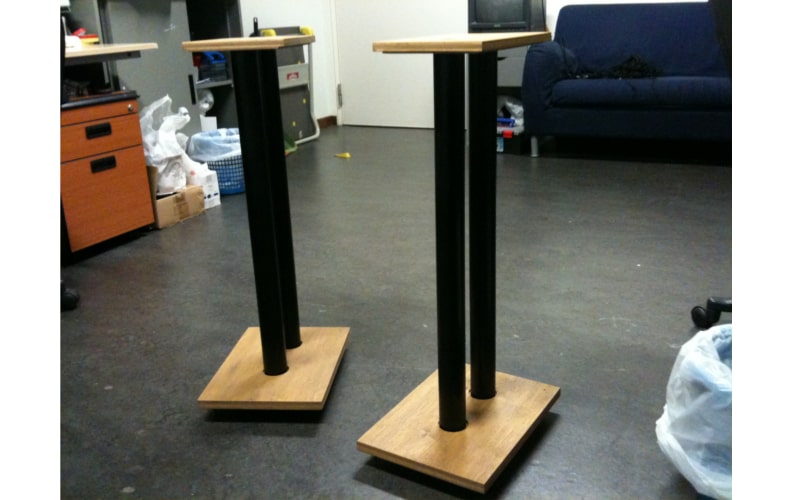
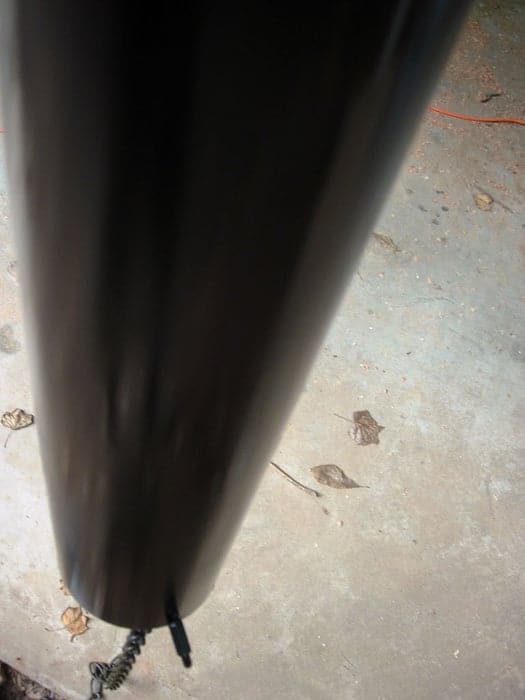
4: Cut Your PVC Pipes of DIY Speaker Stand
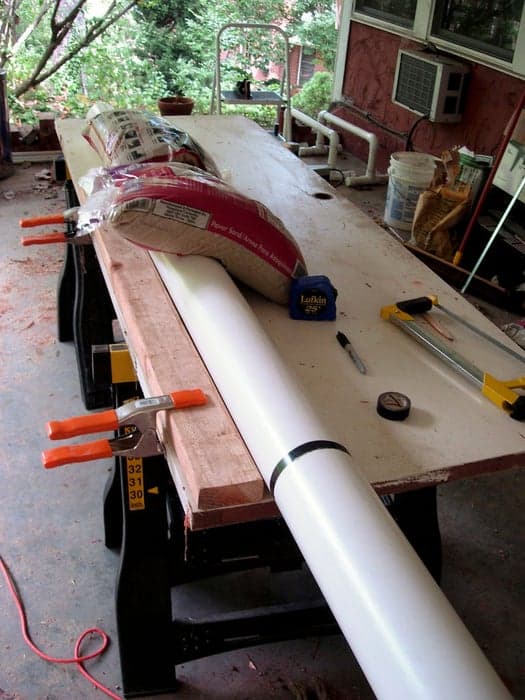
PVC pipes are going to make up your speaker stand’s height. If you want your speaker stand to be 48 inches height, you will need to cut your PVC pipes 46½ inches long.
These numbers are taken from 48 minus the height of plywood. If you use 48 inches for your PVC pipes length, you’ll get speaker stand that’s too high. Mark the area you’re about to cut with tape
To cut PVC pipes, you’ll have to make sure they’re not rolling. One way to do this is by clamping half of your PVC pipe in front of your then hold the pipe down using sand you have bought to build the speaker stand.
Now cut your pipe next to tape you have wrapped around your tape so you’ll cut the pipe straight. To get straight cuts, you must cut the pipe slowly and carefully.
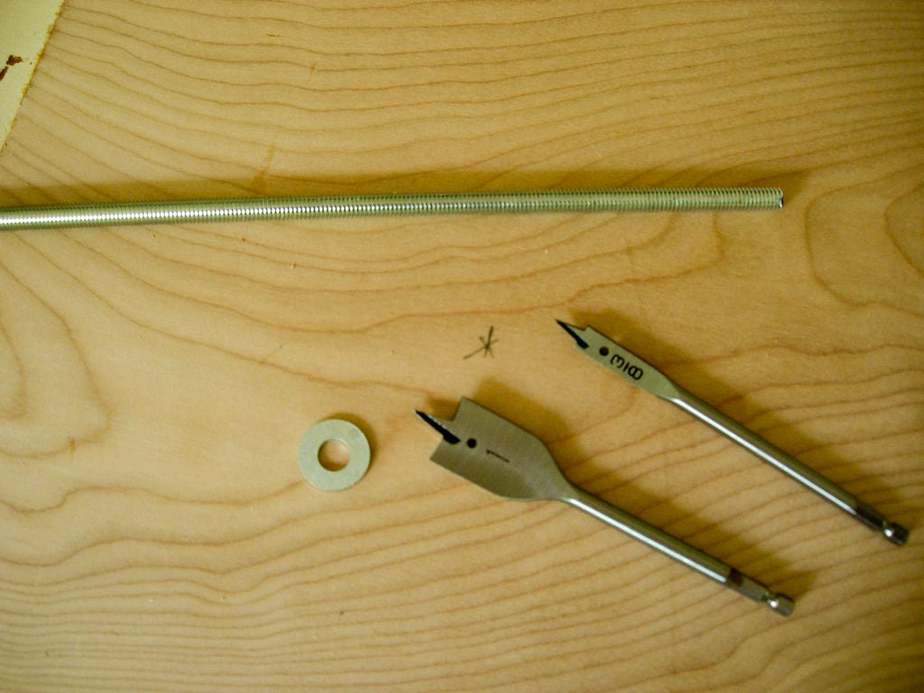
5: Start Cutting the All Thread for Perfect DIY Speaker Stand
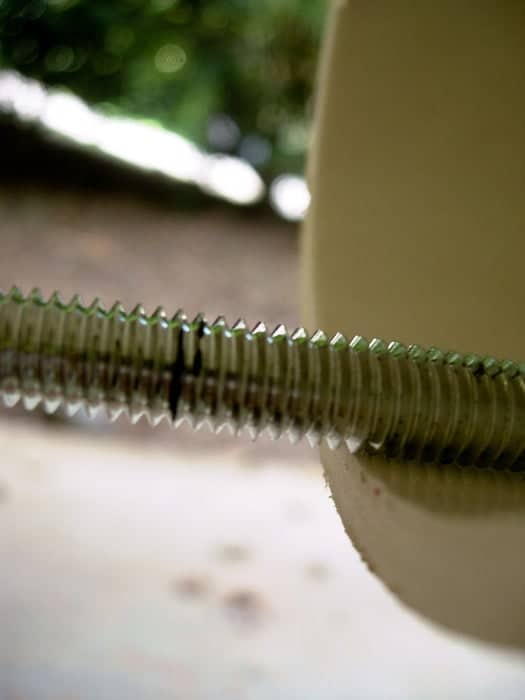
You need to know the length of all thread for speaker stand, so put your all thread inside your pipe then leave about ¾ inch hanging out for both sides. Now mark them off before you cut them with your hacksaw.
Once you’re done cutting, test if it fits with the 3/8 inch nut in order to make sure that you didn’t make mistake when you cut your thread.
6: Drilling and Countersinking both Your Platforms and Base of DIY Speaker Stand
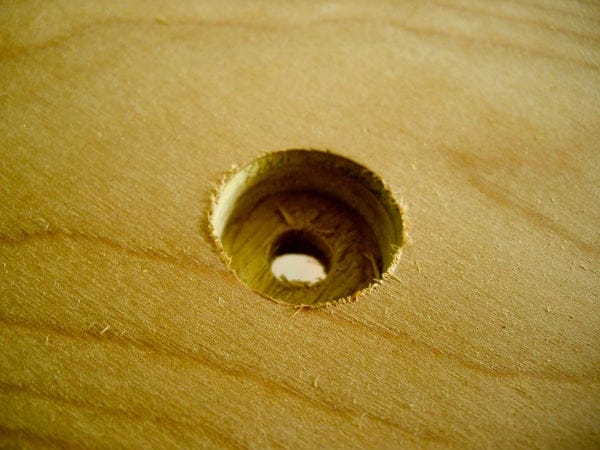
Get your platforms and base then find their center. Now mark one side of your center. Use your drill along with the 1 inch bit to drill halfway through your platforms and bases.
Remember that you should drill the platforms and bases one side only. That will be countersink which allows you to nut then washer to stay flush with boards’ underside.
Test if your nuts and washers are fit in order to be sure that they all sit flush along with your board’s underside if you figure out that they are sticking out, you need to drill your countersink a bit deeper.
Be careful that you don’t drill through your board. When the countersink is finished, drill ¾ inch of hole in your countersink’s center to let your all thread fits in.
7: Painting PVC and Staining Boards for More Beautiful DIY Speaker Stand
You sure can build the simple speaker stand, but gorgeous speaker stand is going to improve your studio’s beauty. Use paint or stain in your favorite color to make your plywood boards look more attractive.
Spray paint your PVC as well in the beautiful color. Make sure you get special spray paint which is going to adhere to materials like PVC pipes.
This step requires you to wait until they’re all dry before you can move to the next step. If you don’t have time for this or you don’t want to get dirt, go to eighth step once you’re finished with the sixth.
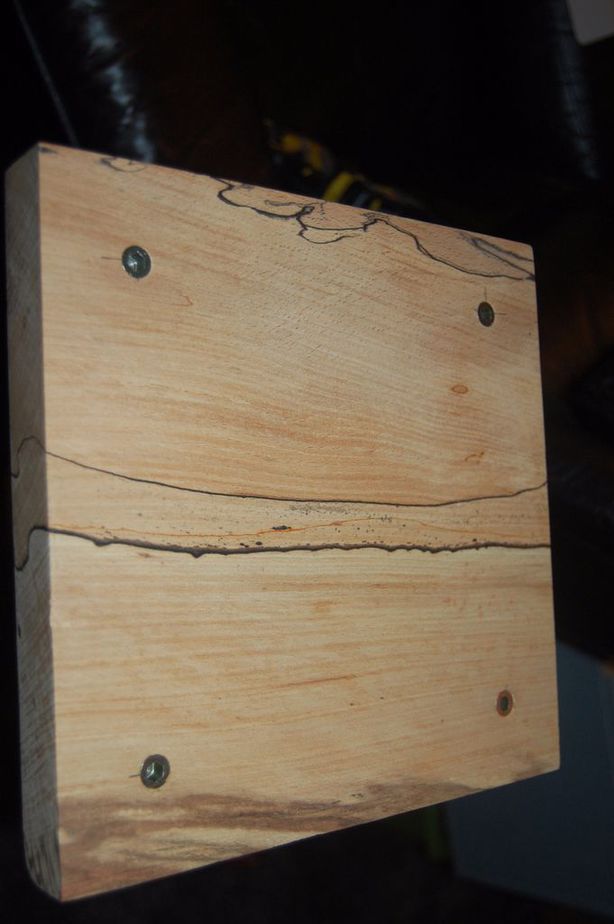
8: Felting or Corking Your DIY Speaker Stand’s Bases
You’re free to use spikes or corks to for your own speaker stand. If you’re about to place your stands on tile, cork pieces are highly recommended.
Cut 1/8 inch of cork board or wine cork and use it for the base. You’re going to need 4 pieces in small size for each base with another one for every corner. Stick those corks on your bases using wood glue. Leave them to dry.
9: Assembling Your DIY Speaker Stand’s Bases
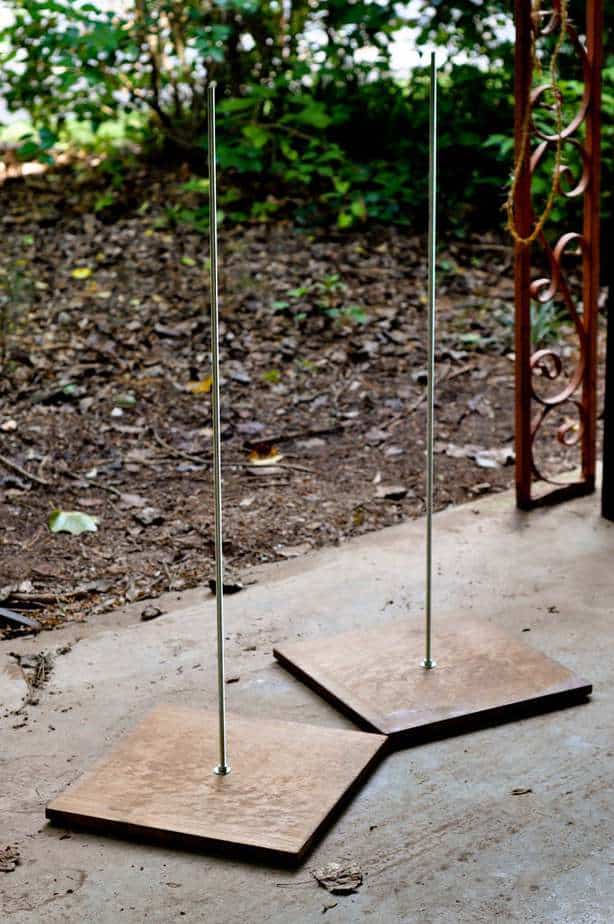
All thread must be attached to your base boards in order to start assembling your speaker stand. To do this you need to screw your bolt on your all thread’s end.
Then put washer underneath the all thread. Next, slip the end through base board’s top/ put another washer into countersink on end which sticks out of bottom. Screw your nut on that end.
Now place your base on the floor so you can pull your all thread up. This must give you all thread that flushes with your board’s base. Finally, screw your top nut to clamp your all thread to speaker stand’s base. Easy, isn’t it?
10: Caulk Your PVC to DIY Speaker Stand’s Bases
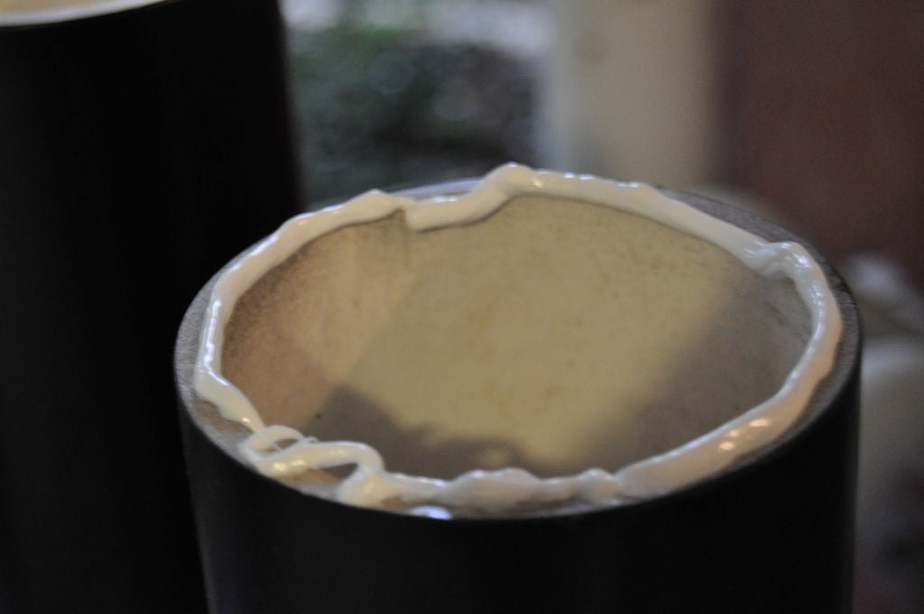
Since you’re going to fill your PVC with sand, you need to make sure that the sand is not leaking out. This means you have to caulk your PVC tubes right to your speaker stand’s bases.
Just caulk the PVC pipes’ underside. Insert your pipe around your all thread and make sure its position is center. The push your pipe down until it touches your speaker stand’s base. Remove excess caulk.
Leave those PVC pipes for few minutes. Put your top on your all tread then tighten your washer and nut down in order to keep your PVCs and bases clamped together as soon as they dry. If possible, consider using the clear caulk.
11: Filling DIY Speaker Stand’s Tubes with Lots of Sand

When your calk dries, you can start unscrewing your speaker’s platform then start filling your PVC tubes using lots of sand. After filling PVC tubes you must screw your top again then knock your speaker stand lightly.
Pick your stand off the floor for about one inch then let the stand drop. It is going to help your sand settle inside your tube, add more sand if you can.
Move your stands to the place you’re about to use them. After filling all tubes with enough sand, you must put the platform on tubes top. With the countersink is siding up, screw your nut and washer on.
This is going to hold all things together. Your handmade speaker stand is now ready to carry the best speakers you own.
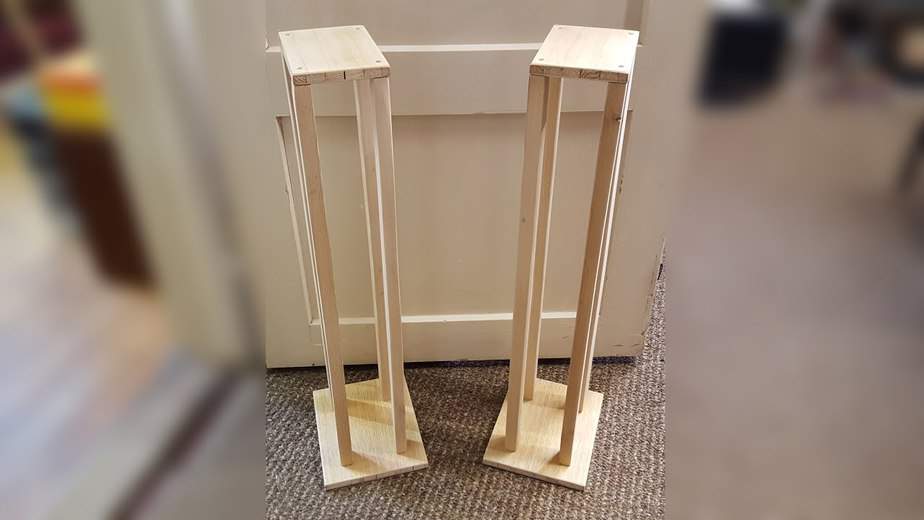
Wooden DIY Speaker Stand with Modern Touch
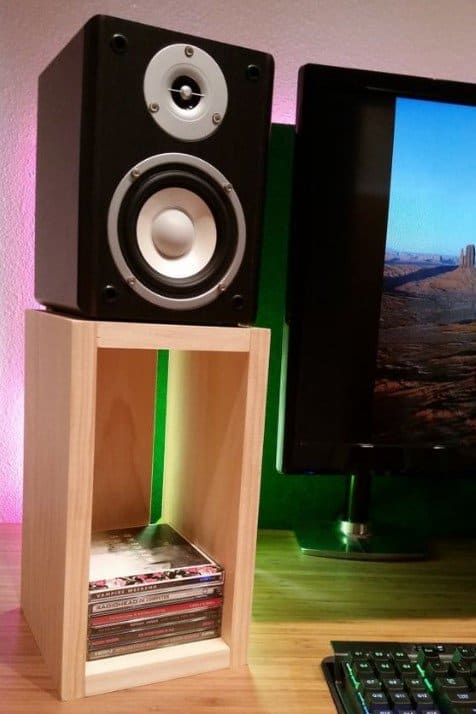
First idea above is about making your own speaker stand using plywood and PVC tube that is loaded with lots of sand. It was the simplest one you could make.
There are some more inspirations about stunning speaker stand you should try. First one is the unpainted wooden stand. Interested to make this one? This one is an easiest multifunctional stand to build.
- Measure the size of your speaker and the book you’re about to store in the speaker stand.
- Build the speaker stand using unpainted woods. Create a small shelf made of three rectangular woods and two square woods (for the base and platform).
- Stick them all using wood glue or nails. Glue might make your shelf looks neater but nails are much stronger.
- Place your shelf whenever you want it to be. Put the speaker on top of the shelf then use the bottom part of that shelf to store your favorite novels or the other stuffs you want to display.
This speaker stand might be made of woods, but the sleek design makes it perfect for modern room. Interested to build this handmade speaker stand?
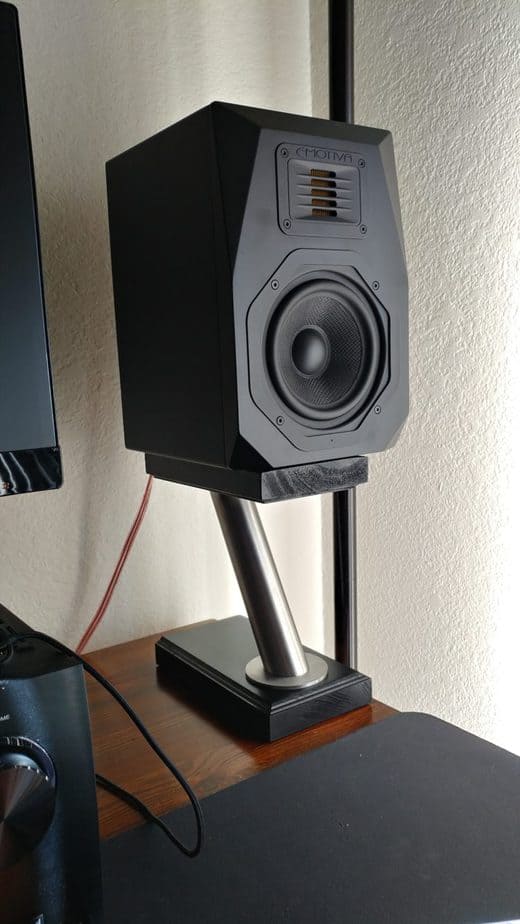
Industrial Styled DIY Speaker Stand
If your room has an industrial styled interior, you need speaker stand that supports the interior design. Build your own industrial speaker stand from some ABS pipes. Here are steps to make the unique speaker stand.
- Get your speaker size measured.
- Gather some ABS pipes that will build a perfect stand for each of your speakers.
- Clean your ABS pipes’ both ends using cleaner.
- Add primer then cement to your pipes’ outside and inside surfaces.
- Slide your ABS pipes into connector then turn your pipes 90 degrees. This is going to seat both surfaces. Leave them for forty seconds to let the glue dries.
- Place your speakers on the industrial styled stands and turn the music on.
Mini DIY Speaker Stand to Complete Your Desktop
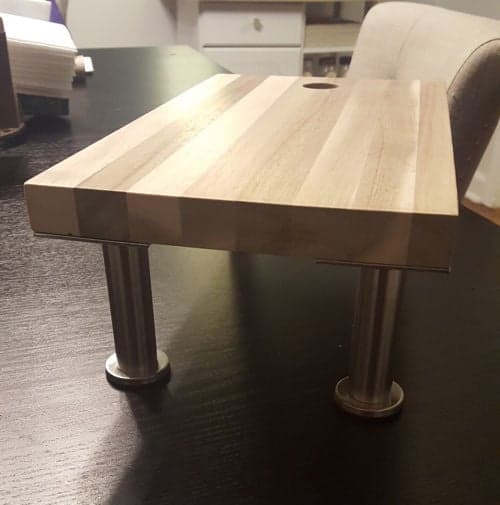
Your personal computer will look much more stunning with a great looking speaker stand under each speaker on both sides of the PC.
Instead of purchasing desktop speaker stand, explore your skill by trying making one by yourself. Are you interested to make one the most interesting speaker stand for your desktop? Make sure you prepare these materials first:
- 2 chopping boards from your favorite brand, pick ones that the size is 13¾ inches x 7¾ inches.
- 8 pieces of legs for the stand with each leg is 4½ inches long.
- Pencil
- Drill
- Head screwdriver
If you cannot hide your speakers behind your desktop or mount the speakers on your wall, building handmade desktop stands is the most genius idea.
When looking the chopping boards, consider finding ones that have hole where you can place your wires.
And speaking about the legs, pick speaker stand’s legs that are not just cool but also sturdy to hold the speakers. You can also try looking for legs that are adjustable. Now let us see how to build the beautiful speaker stand.
Assembling DIY Speaker Stand to Complete Your Desktop
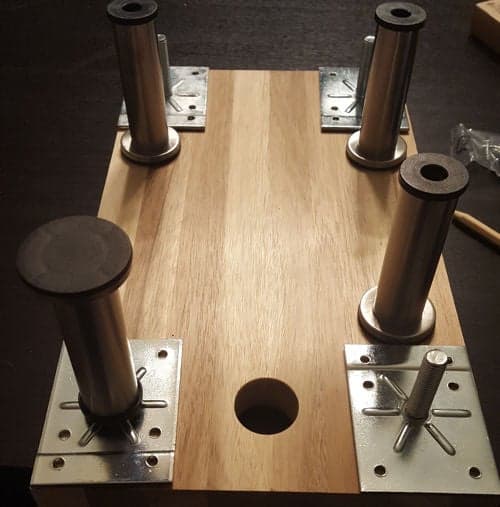
- First of all, you must lay out both boards and legs on the ground or working desk. Then use your pencil to mark several spots where you will screw stand’s legs in the boards.
- Then take your drill to make tiny hole right at every mark you have made.
- Get your screwdriver and use it to attach the legs to your boards.
In just fifteen minutes your handmade speaker stand is ready to make your personal computer looks adorable. These speaker stands are going to be awesome for bookshelf speakers and 5 inch sized studio monitors.
If your speakers are bigger, get bigger chopping boards as well as longer legs. What are you waiting for? Go get the entire tools and materials ready before you start building the stands.
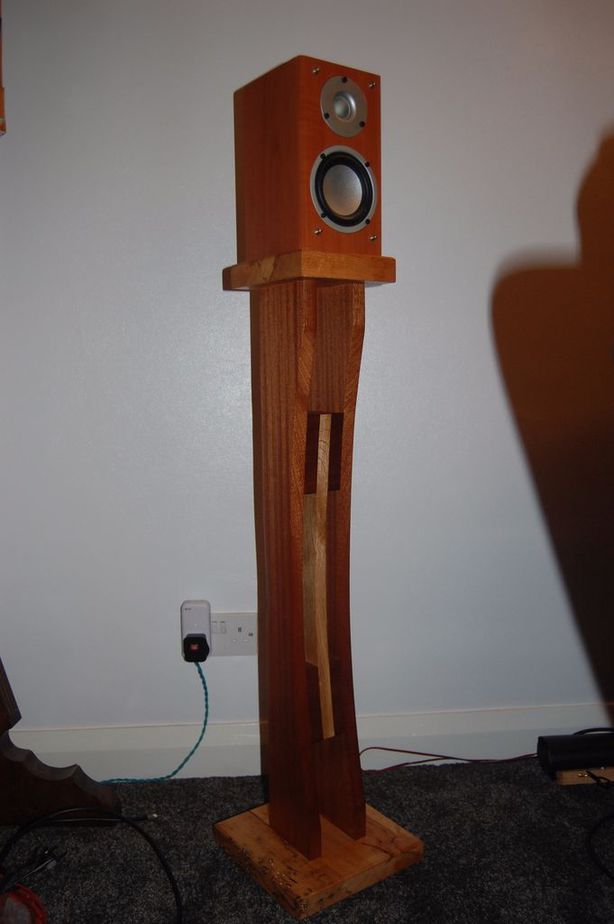
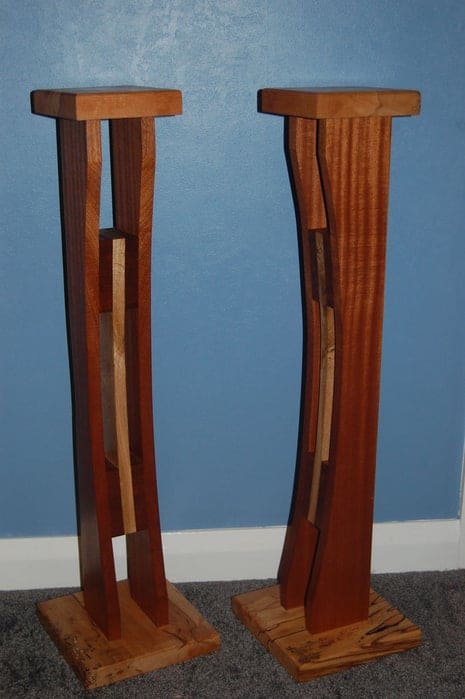
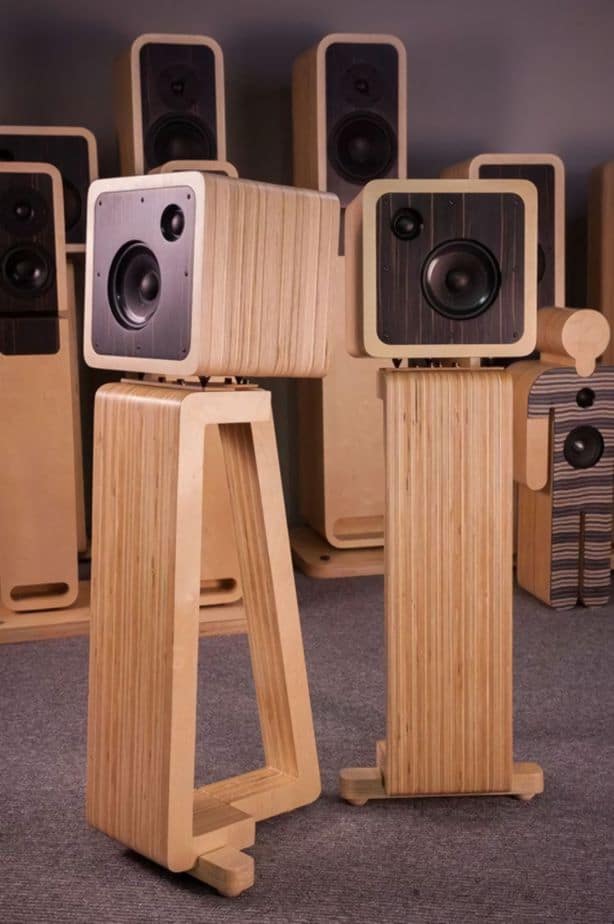
Luxurious DIY speaker stand for Wooden Speakers
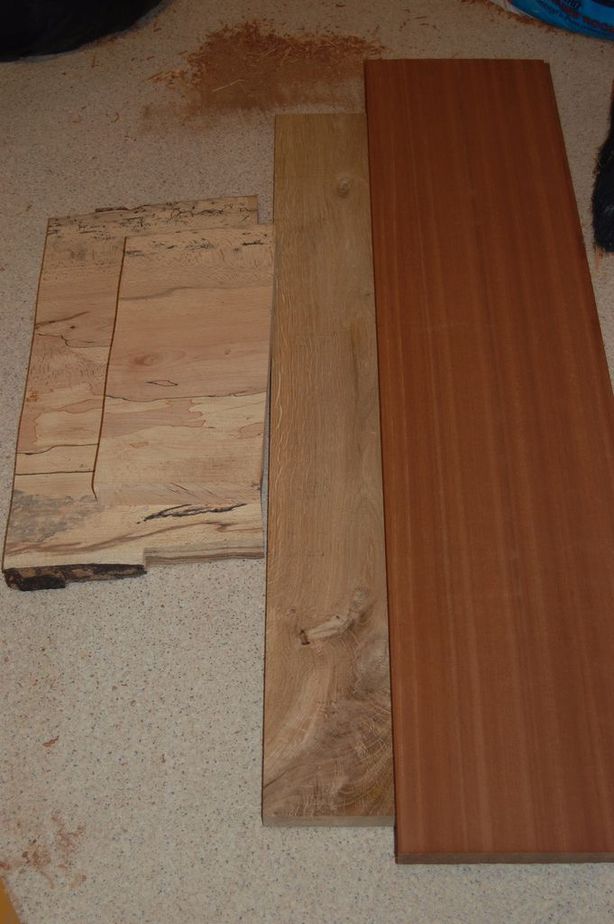
To build the extraordinarily luxurious speaker stand, you should find these tools and materials first:
- Hand saw
- Band saw
- Table saw
- Router
- Chisels
- Sapele wood 4 in 37.5 inches x 4 inches x ¾ inch
- Oak wood 2 in 25.5 inches x 4 inches x ¾ inch
- Spalted beach wood 2 in 6.5 inches x 6 inches x 1.5 inch
- Spalted beach wood 2 in 8 inches x 8 inches x 1.5 inch
- Nut inserts in 6 millimeters x 20 millimeters
- Threaded bar in 300 millimeters x 6 millimeters
- Wood glue
Is everything ready? Then you can jump to the steps of making luxurious stands for your wooden speakers.
Complete Steps to Build Wooden DIY Speaker Stand
Check your tools and materials again before you start. If they’re not complete you should start or else you’ll be distracted looking for the stuffs you need to build your speaker stand.
But if everything is gathered on your working desk, it is time to follow these guides.
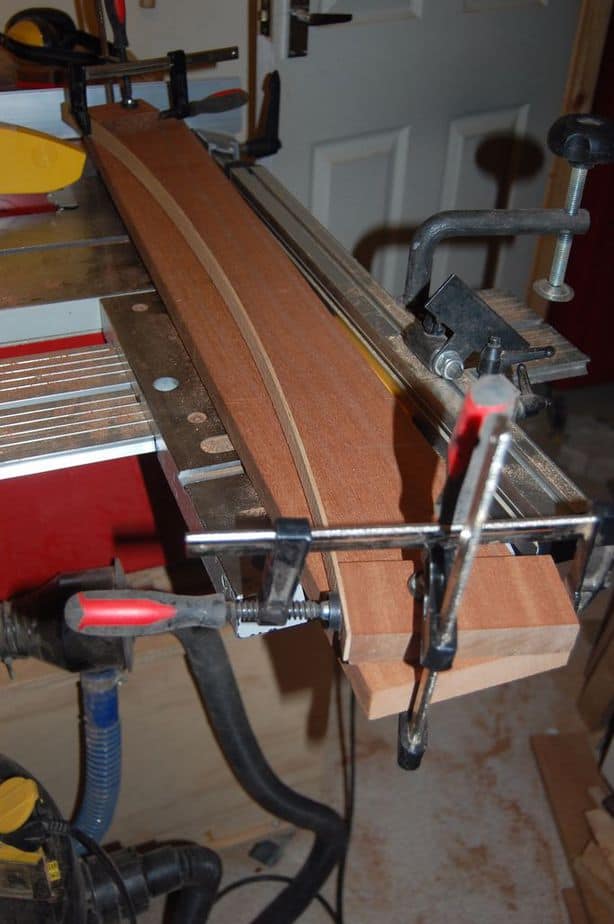
1. Process your woods first
You must first flatten your woods. Fist your sapele wood’s joint or plane by using thickness or planer. Make sure you make both faces of your sapele woods are parallel and flat.
Then for your spalted beach wood, cut both top and base then treat the wood in the same way as you processed your sapele wood. Make sure your oak wood is also flat.
2. Shape your uprights
What makes wooden speaker stand special is a curve owned by its uprights. Draw curve you desire on your oak wood using pencil.
Then cut the curve using band saw. You will need the uprights flawless so take card scrapper to smoothen the oak wood.
3. Fixing your uprights to both top and base
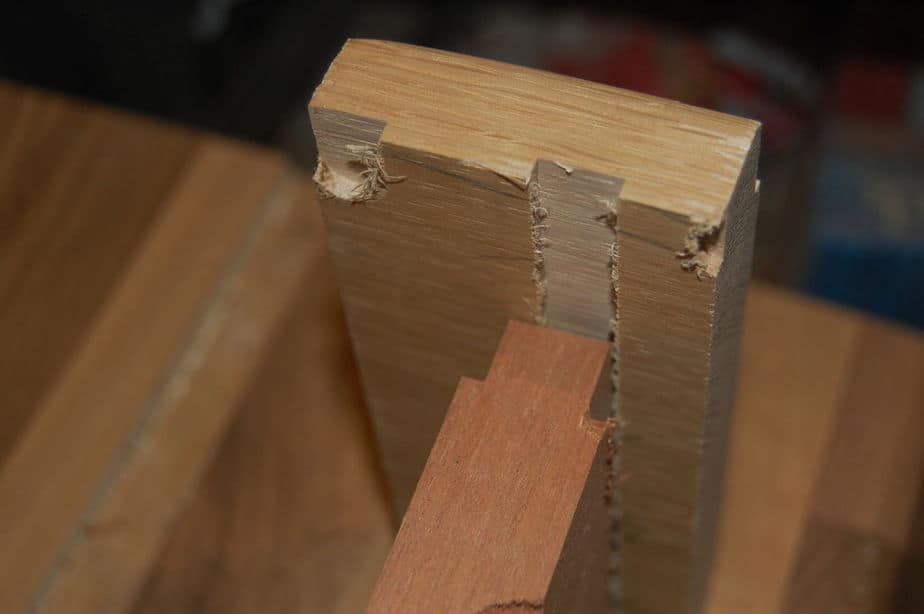
Use real joinery in order to fix your uprights to speaker stand’s top and base. Consider using table router to build the joinery. Start with your router a little low then raise it little by little to cut two sides of the oak wood. Test your joint.
4. Gluing, shaping, sanding your speaker stand
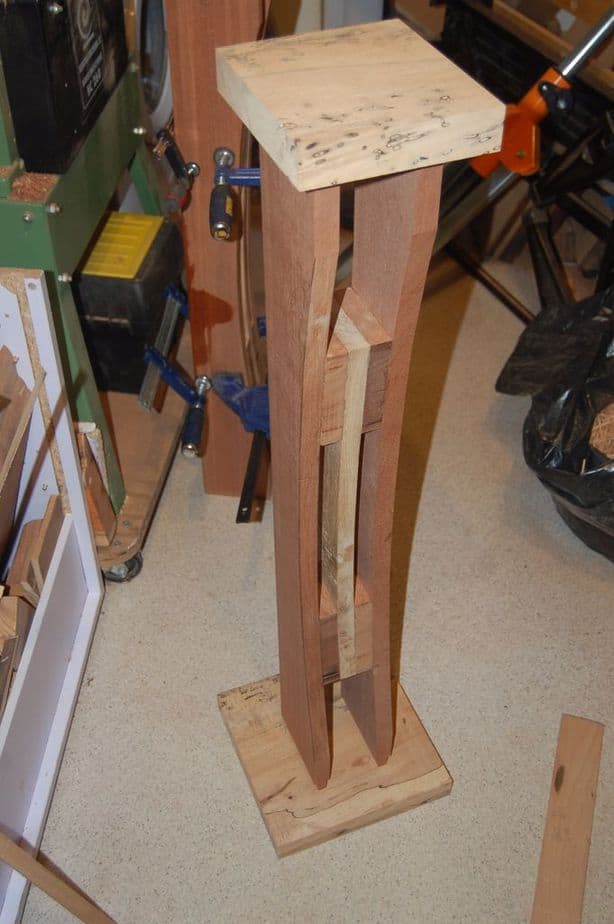
It is time to glue your uprights together then leave them for several hours in order to let them dry. Use bobbin sander, sander, and card scraper to finish your speaker stand’s uprights.
Sand your uprights using 320 grits in order to get extra smooth finish.
5. Preparing speaker stand’s mortises
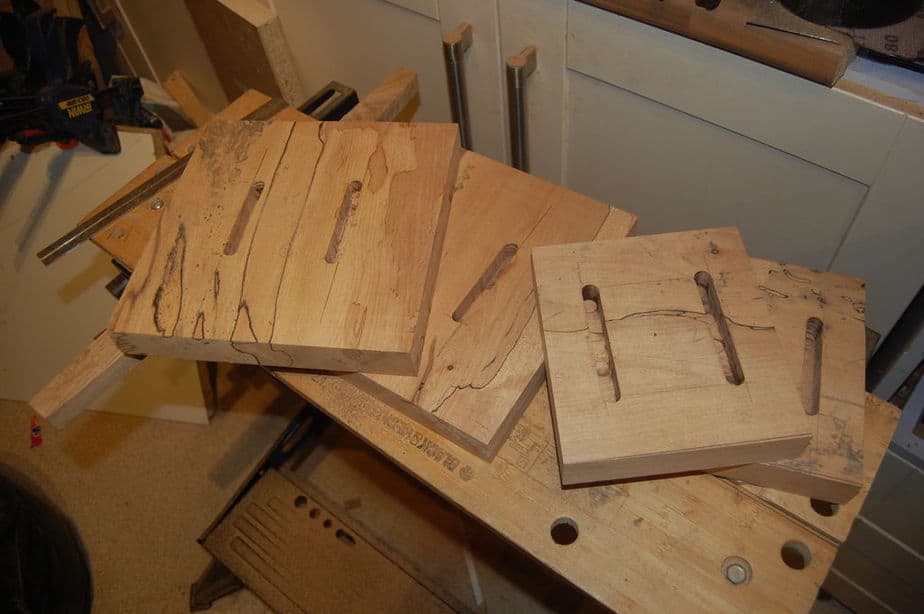
When you’re done with uprights, you can start setting out mortises precisely. Use a wooden piece to guide you in cutting mortises. Square off your mortises ends using chisel for neater look.
6. Clamp your speaker stand and finish it
Dry fit testing is crucial to check if the entire joints are well fit. After testing, you can glue the entire joints then clamping them between your speaker stand’s top sand bases.
Use Danish oil to add three coats to your speaker stand.
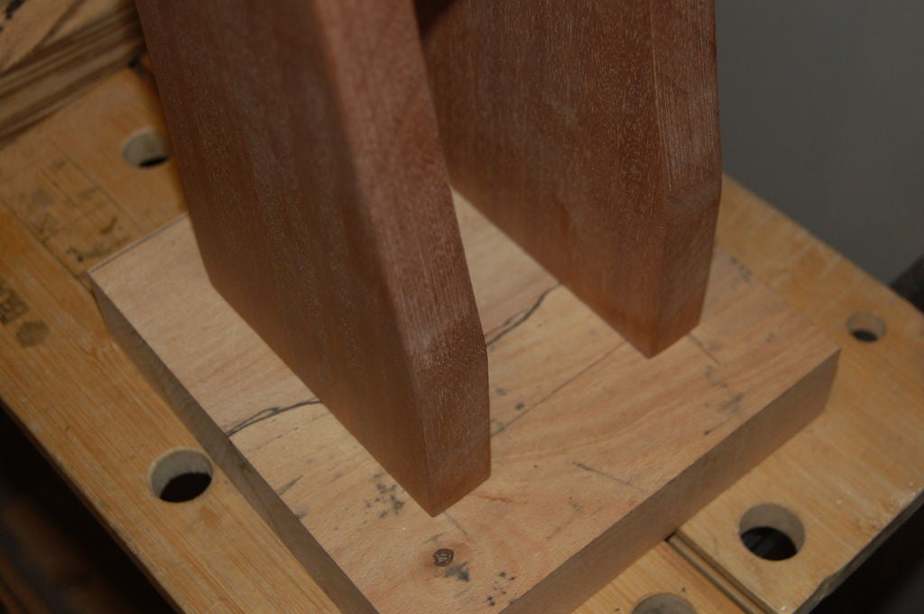
7. Placing your handmade speaker stand
If you’re about to place your speaker stand on carpeted floor, you’ll love having spikes on stands’ base. Drill four holes in 6 millimeters diameter to the base of your stands. Then screw in your insert nuts using key.
Being Creative in Building DIY Speaker Stand
Assorted materials can be used to build speaker stand. This page shows you that you can use PVC pipes, ABS pipes, woods, plywood, and some other materials to build handmade speaker stand.
All you need is a little creativity and huge of willing. Tutorials will help you making your dreams come true. Just make sure you have the dreams so that we can help you making them true.
When you’re planning to build your own speaker stand, you need to check your interior design. Since speaker stand is just an accessory for the room, its design must be adjusted to your interior design.
If your room has modern interior, bulky rustic wooden speaker stand is going to ruin your room. Always keep in mind that your speaker stand can either perfect or destroy the beauty of your studio.
Many sites show you how gorgeous their speaker stands are, made of materials you cannot find. If you’re interested in trying the ideas above but you couldn’t find the right materials listed, go get similar material you can find.
Just make sure that they’re strong enough to hold the speakers you own. Using secondhand materials will help you save your budget. Use old stuffs you don’t use anymore, like old wooden table or door.
But since they’re old, you might want to be really careful in working with them, you don’t want them to be broken before you even use them as speaker stands.